Why Upload Pictures to Google?
Uploading pictures to Google can have a significant impact on online visibility and engagement. By adding visuals to Google, individuals and businesses can enhance their search engine optimization (SEO) and improve their online presence. This is especially important in today’s digital age, where visual content is becoming increasingly popular. In fact, studies have shown that pages with images are more likely to appear in search engine results pages (SERPs) than those without.
Moreover, uploading pictures to Google can help to increase engagement and drive more traffic to a website. When users search for a particular topic or keyword, they are more likely to click on a result that includes an image. This is because images can help to break up text and make content more visually appealing. Additionally, images can be optimized with alt tags and descriptions, which can further improve their visibility in search engine results.
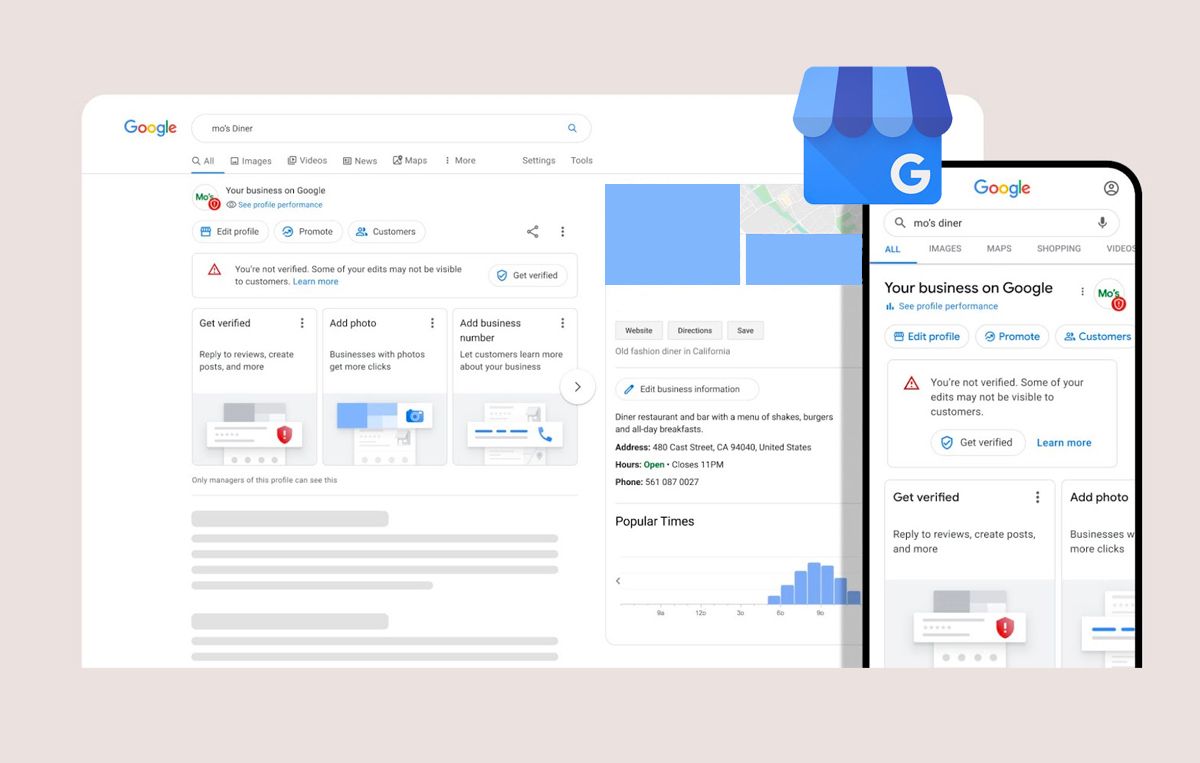
For businesses, uploading pictures to Google can be especially beneficial. By adding images to their Google My Business listing, businesses can showcase their products or services and provide customers with a better understanding of what they offer. This can help to increase customer engagement and drive more sales. Furthermore, businesses can use Google Photos to store and manage their images, making it easy to access and share them across different platforms.
Overall, uploading pictures to Google can have a range of benefits, from improving SEO and online visibility to increasing engagement and driving more traffic to a website. Whether you’re an individual or a business, adding visuals to Google can help to take your online presence to the next level. So, if you’re wondering how do I upload a picture on Google, the answer is simple: just follow the steps outlined in this guide and start uploading your images today.
Preparing Your Image for Upload
Before uploading your image to Google, it’s essential to prepare it for optimal upload quality. This includes resizing, compressing, and formatting your image to ensure it meets Google’s requirements. By doing so, you can ensure that your image is displayed correctly and loads quickly, providing a better user experience.
Resizing your image is crucial to ensure it fits within Google’s recommended dimensions. For example, if you’re uploading an image to Google My Business, the recommended dimensions are 720 x 720 pixels. You can use image editing software like Adobe Photoshop or Canva to resize your image.
Compressing your image is also important to reduce its file size. This can be done using tools like TinyPNG or ImageOptim, which can compress your image without compromising its quality. By compressing your image, you can reduce the file size and make it load faster.
Formatting your image is also crucial to ensure it meets Google’s requirements. For example, Google recommends using JPEG or PNG file formats for images. You can use image editing software to convert your image to the recommended format.
Additionally, it’s essential to optimize your image’s metadata, including the file name, alt tag, and description. This can help improve your image’s visibility in Google search results. For example, you can use descriptive file names that include your target keywords, and add alt tags and descriptions that provide context to your image.
By preparing your image for upload, you can ensure that it’s displayed correctly and loads quickly, providing a better user experience. Whether you’re uploading an image to Google Drive, Google My Business, or Google Photos, following these tips can help you get the most out of your image upload.
Uploading Images to Google Using Google Drive
Google Drive is a popular cloud storage service that allows users to store and access their files from anywhere. Uploading images to Google Drive is a straightforward process that can be completed in a few steps. To get started, you’ll need to create a Google account if you don’t already have one.
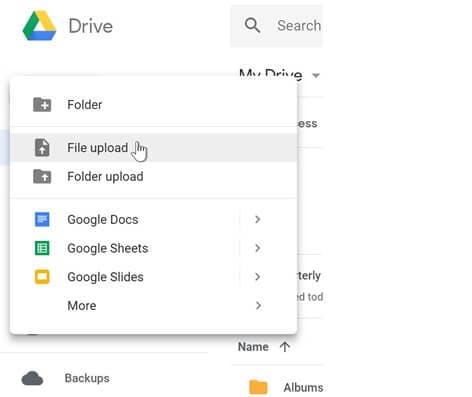
Once you have a Google account, you can access Google Drive by navigating to drive.google.com. From there, you can click on the “New” button to upload a file. You can then select the image you want to upload from your computer or mobile device.
Google Drive allows you to upload images in a variety of formats, including JPEG, PNG, and GIF. You can also upload multiple images at once by selecting them all at the same time. Once your images are uploaded, you can organize them into folders and share them with others.
One of the benefits of uploading images to Google Drive is that you can access them from anywhere. Whether you’re using a computer, tablet, or smartphone, you can access your images from the Google Drive app or website. This makes it easy to share images with others or use them in presentations and documents.
In addition to storing images, Google Drive also allows you to edit them using the built-in image editor. This feature allows you to crop, resize, and adjust the brightness and contrast of your images. You can also use the image editor to add text and shapes to your images.
Overall, uploading images to Google Drive is a convenient and flexible way to store and access your images. Whether you’re looking to share images with others or use them in your own projects, Google Drive is a great option. So, if you’re wondering how do I upload a picture on Google, the answer is simple: just use Google Drive.
Adding Images to Google My Business
Adding images to Google My Business listings is a crucial step in enhancing online presence and attracting potential customers. By uploading high-quality images, businesses can showcase their products, services, and brand identity, ultimately driving more engagement and sales. To add images to Google My Business, follow these steps:
Step 1: Claim and Verify Your Google My Business Listing
Ensure that your business has a verified Google My Business listing. This is essential to access the image upload feature. If you haven’t claimed your listing yet, sign in to your Google account and follow the verification process.
Step 2: Access Google My Business Dashboard
Log in to your Google account and access the Google My Business dashboard. Click on the “Photos” tab from the left-hand menu.
Step 3: Upload Images
Click on the “Add photos” button and select the images you want to upload from your computer or mobile device. You can upload multiple images at once. Ensure that the images are in the recommended format (JPG or PNG) and size (minimum 720 x 720 pixels).
Step 4: Optimize Image Descriptions
Once the images are uploaded, add descriptive captions to each image. This will help Google understand the content of the image and improve its visibility in search results. Use relevant keywords and phrases that describe the image, but avoid keyword stuffing.
Step 5: Leverage Google My Business Features
Google My Business offers various features to enhance your online presence. Use the “Posts” feature to share updates, offers, and events, and include images to make them more engaging. You can also use the “Products” feature to showcase your products and services with images.
By following these steps and optimizing your images, you can improve your Google My Business listing and attract more customers. Remember to regularly update your images to keep your listing fresh and engaging. If you’re wondering how do I upload a picture on Google, the process is straightforward, and the benefits are numerous.
Uploading Images to Google Photos
Google Photos is a popular platform for storing and sharing images. Uploading images to Google Photos is a straightforward process that can be completed from a computer or mobile device. To get started, follow these steps:
Step 1: Access Google Photos
Sign in to your Google account and access Google Photos from the Google app menu or by visiting the Google Photos website. If you don’t have a Google account, create one to access Google Photos.
Step 2: Upload Images from Computer
To upload images from your computer, click on the “Upload” button and select the images you want to upload. You can also drag and drop images into the Google Photos window. Ensure that the images are in the recommended format (JPG or PNG) and size (minimum 720 x 720 pixels).
Step 3: Upload Images from Mobile Device
To upload images from your mobile device, open the Google Photos app and tap on the “Upload” button. Select the images you want to upload from your device’s gallery or take new photos directly from the app.
Step 4: Organize Images Using Albums and Tags
Once your images are uploaded, organize them using albums and tags. Albums allow you to group related images together, while tags help you categorize images based on keywords. This makes it easier to search and find specific images later.
Step 5: Use Google Photos Features
Google Photos offers various features to enhance your image storage and sharing experience. Use the “Assistant” feature to automatically create albums and stories based on your images. You can also use the “Sharing” feature to share images with others and control who can view them.
By following these steps, you can easily upload images to Google Photos and take advantage of its features. If you’re wondering how do I upload a picture on Google, the process is simple, and Google Photos is a great platform to store and share your images.
Tips for Uploading Images to Google Photos:
Use the Google Photos app to upload images from your mobile device for a more seamless experience.
Use descriptive file names and tags to make it easier to search and find specific images.
Regularly backup your images to Google Photos to ensure they are safe and accessible.
Troubleshooting Common Upload Issues
When uploading images to Google, several issues may arise, causing frustration and delays. Fortunately, most of these issues can be easily resolved with a few troubleshooting steps. In this section, we’ll address common upload issues and provide solutions to get you back on track.
File Size Limitations
Google has file size limitations for image uploads, which can vary depending on the platform. For example, Google Drive has a 750MB file size limit, while Google Photos has a 100MB limit. If your image exceeds these limits, try compressing or resizing it before uploading.
Format Restrictions
Google only accepts certain image formats, such as JPEG, PNG, GIF, and BMP. If your image is in a different format, convert it to one of the accepted formats before uploading. You can use image editing software or online tools to convert your image.
Upload Errors
Upload errors can occur due to various reasons, such as poor internet connectivity, server issues, or corrupted files. If you encounter an upload error, try the following:
Check your internet connection and ensure it’s stable.
Try uploading the image again, and if the issue persists, try uploading a different image.
Clear your browser cache and cookies, and then try uploading the image again.
Image Upload Failed Due to Copyright Issues
In some cases, Google may reject your image upload due to copyright issues. This can happen if the image is copyrighted or contains copyrighted material. To resolve this issue, ensure you have the necessary permissions or licenses to upload the image. You can also try uploading a different image or editing the image to remove any copyrighted material.
Other Common Issues
Other common issues that may arise during image upload include:
Image orientation issues: Ensure your image is in the correct orientation before uploading.
Image quality issues: Ensure your image is of high quality and meets Google’s image quality guidelines.
Metadata issues: Ensure your image metadata is accurate and complete, including file names, descriptions, and tags.
By following these troubleshooting steps, you can resolve common image upload issues and successfully upload your images to Google. If you’re still having trouble, refer to Google’s support resources or contact their customer support team for assistance. Remember, if you’re wondering how do I upload a picture on Google, the process is straightforward, and troubleshooting common issues can help you overcome any obstacles.
Optimizing Images for Google Search
Optimizing images for Google search is crucial to improve image visibility and ranking. By following these tips, you can increase the chances of your images appearing in Google search results and drive more traffic to your website.
Use Descriptive File Names
Use descriptive file names that include the target keywords for your image. This will help Google understand the content of your image and improve its visibility in search results. For example, if your image is of a red rose, use a file name like “red-rose.jpg” instead of “image123.jpg”.
Alt Tags and Captions
Alt tags and captions provide additional context to your image and help Google understand its content. Use descriptive alt tags and captions that include the target keywords for your image. This will also improve the accessibility of your image for users with visual impairments.
Image Compression and Size
Image compression and size can affect the loading speed of your website and impact your search engine rankings. Use image compression tools to reduce the file size of your images without compromising their quality. Aim for an image size of less than 100KB to ensure fast loading speeds.
Image Format and Type
Use the correct image format and type for your images. JPEG is the recommended format for photographs, while PNG is recommended for graphics and illustrations. Avoid using GIFs unless necessary, as they can increase the file size of your images.
Image Metadata
Image metadata includes information like the image title, description, and keywords. Use descriptive metadata to provide additional context to your image and help Google understand its content.
Image Sitemap
Create an image sitemap to help Google discover and index your images. An image sitemap is a file that lists all the images on your website and provides additional metadata to help Google understand their content.
By following these tips, you can optimize your images for Google search and improve their visibility and ranking. Remember, if you’re wondering how do I upload a picture on Google, the process is straightforward, and optimizing your images can help you get the most out of your uploads.
Additional Tips:
Use high-quality images that are relevant to your content.
Avoid using too many images on a single page.
Use images consistently across your website to improve brand recognition.
Best Practices for Image Upload and Management
Uploading and managing images on Google requires a strategic approach to ensure optimal performance, visibility, and consistency. By following best practices, you can maximize the benefits of image upload and management on Google.
Regular Backups
Regular backups are essential to prevent image loss and ensure business continuity. Use Google Drive or Google Photos to backup your images, and consider using third-party backup services for added security.
Image Organization
Organize your images using albums, tags, and descriptions to improve searchability and accessibility. This will also help you to quickly find and manage your images across different platforms.
Image Consistency
Ensure image consistency across online platforms by using the same image formats, sizes, and compression levels. This will help to maintain a professional brand image and improve user experience.
Image Optimization
Optimize your images for Google search by using descriptive file names, alt tags, and captions. This will improve image visibility and ranking, driving more traffic to your website.
Image Security
Ensure image security by using secure protocols for image upload and management. Use HTTPS instead of HTTP, and consider using two-factor authentication for added security.
Image Analytics
Use image analytics to track image performance, engagement, and conversion rates. This will help you to refine your image upload and management strategy, improving overall performance and ROI.
Image Compliance
Ensure image compliance with Google’s terms of service and copyright laws. Use royalty-free images or obtain necessary permissions to avoid copyright infringement.
By following these best practices, you can optimize your image upload and management strategy on Google, improving performance, visibility, and consistency. Remember, if you’re wondering how do I upload a picture on Google, the process is straightforward, and following best practices can help you get the most out of your uploads.
Additional Tips:
Use image compression tools to reduce file size and improve loading speeds.
Use image editing software to enhance image quality and consistency.
Use Google’s image recognition technology to automatically tag and categorize your images.


