What is Reverse Image Search and How Does it Work?
Reverse image search is a powerful tool that allows users to search for images based on a reference image, rather than a text-based query. This technology has numerous benefits, including the ability to identify unknown images, find similar pictures, or track down the source of an image. On iPhone, reverse image search can be a valuable asset for users who want to uncover more information about an image they’ve come across.
Reverse image search works by analyzing the visual content of an image and matching it to similar images in a database. This process involves complex algorithms that can identify patterns, shapes, and colors within an image. When a user performs a reverse image search on iPhone, the device sends the image to a server, which then searches for matching images in its database.
The benefits of reverse image search on iPhone are numerous. For example, users can identify unknown objects or landmarks in an image, find similar products or images, or track down the source of a meme or viral image. Additionally, reverse image search can be a useful tool for researchers, journalists, and investigators who need to verify the authenticity of an image.
By understanding how reverse image search works, iPhone users can unlock the full potential of this powerful tool. Whether you’re a casual user or a professional, reverse image search can be a valuable asset in your toolkit. In the next section, we’ll explore how to use Google Lens to perform reverse image searches on iPhone.
Using Google Lens to Reverse Image Search on iPhone
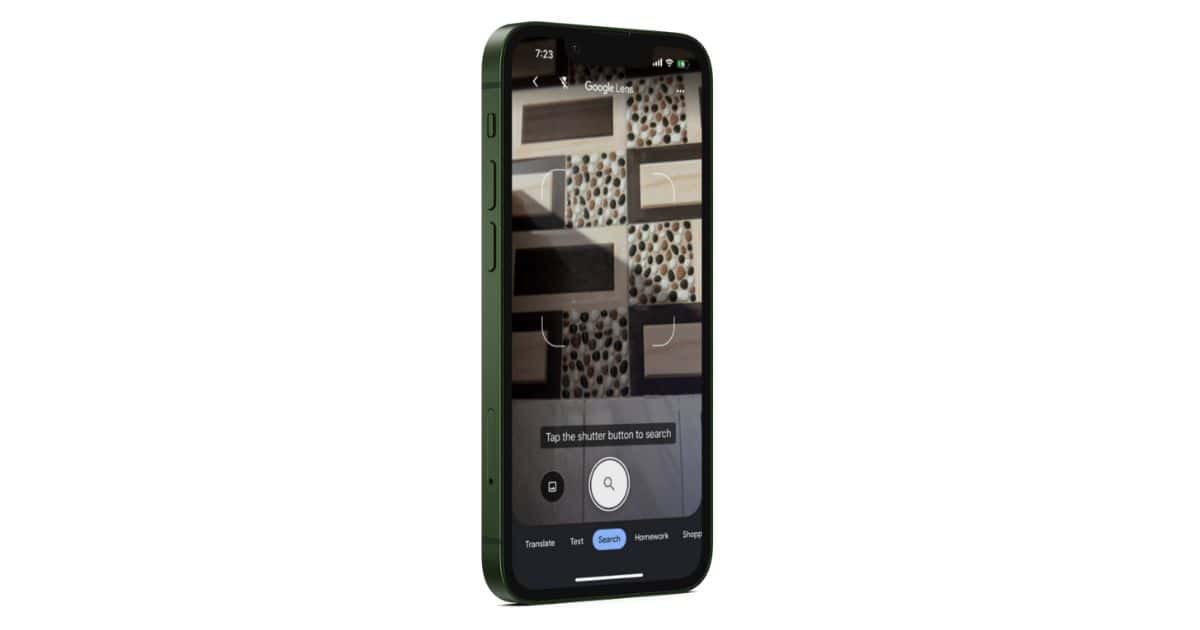
Google Lens is a powerful tool that allows users to perform reverse image searches on their iPhone. To access Google Lens, users can follow these steps:
1. Open the Google app on your iPhone.
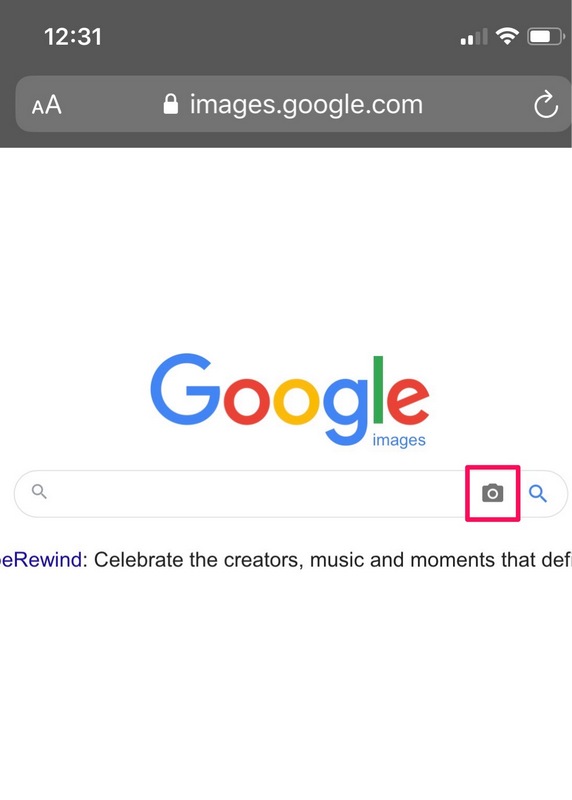
2. Tap the camera icon in the search bar.
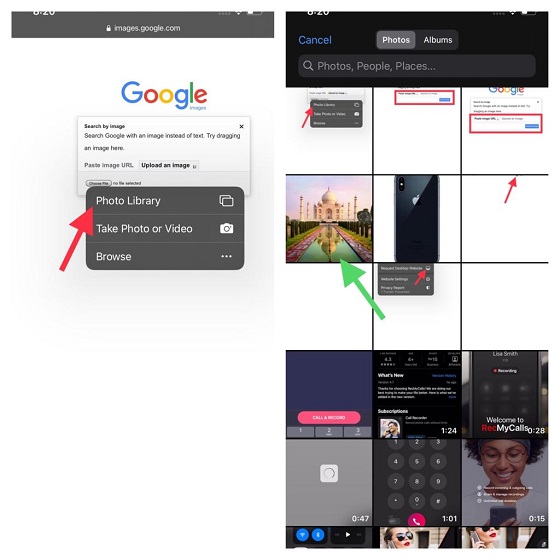
3. Select the image you want to search for from your camera roll or take a new photo.
4. Google Lens will analyze the image and provide search results, including similar images, product information, and more.
Google Lens is a convenient and easy-to-use tool for performing reverse image searches on iPhone. It’s especially useful for identifying objects, landmarks, and products in images. Additionally, Google Lens can provide more information about the image, such as the location where it was taken or the product’s price.
One of the benefits of using Google Lens for reverse image search on iPhone is its ability to provide accurate results quickly. Google Lens uses advanced algorithms to analyze the image and provide relevant search results. This makes it a valuable tool for anyone looking to learn more about an image.
By using Google Lens to perform reverse image searches on iPhone, users can unlock a wealth of information about the images they encounter. Whether you’re trying to identify an unknown object or find more information about a product, Google Lens is a powerful tool that can help.
Alternative Methods for Reverse Image Search on iPhone
While Google Lens is a powerful tool for reverse image search on iPhone, there are alternative methods that can be used to achieve similar results. One such method is using third-party apps such as TinEye or Reversee.
TinEye is a popular reverse image search app that allows users to search for images based on a reference image. The app uses advanced algorithms to analyze the image and provide search results, including similar images and information about the image’s source.
Reversee is another reverse image search app that allows users to search for images based on a reference image. The app uses a combination of machine learning and computer vision to analyze the image and provide search results.
Both TinEye and Reversee offer a range of features and benefits, including the ability to search for images based on a reference image, filter results, and verify image authenticity. However, the two apps differ in their approach to reverse image search.
TinEye uses a more traditional approach to reverse image search, relying on a database of images to provide search results. Reversee, on the other hand, uses a more advanced approach, relying on machine learning and computer vision to analyze the image and provide search results.
Ultimately, the choice between TinEye and Reversee will depend on the user’s specific needs and preferences. Both apps offer a range of features and benefits, and can be used to achieve similar results to Google Lens.
In addition to TinEye and Reversee, there are other alternative methods for reverse image search on iPhone, including using online reverse image search tools such as Bing Image Search or Yandex Image Search. These tools allow users to search for images based on a reference image, and can provide similar results to Google Lens.
How to Use Safari to Reverse Image Search on iPhone
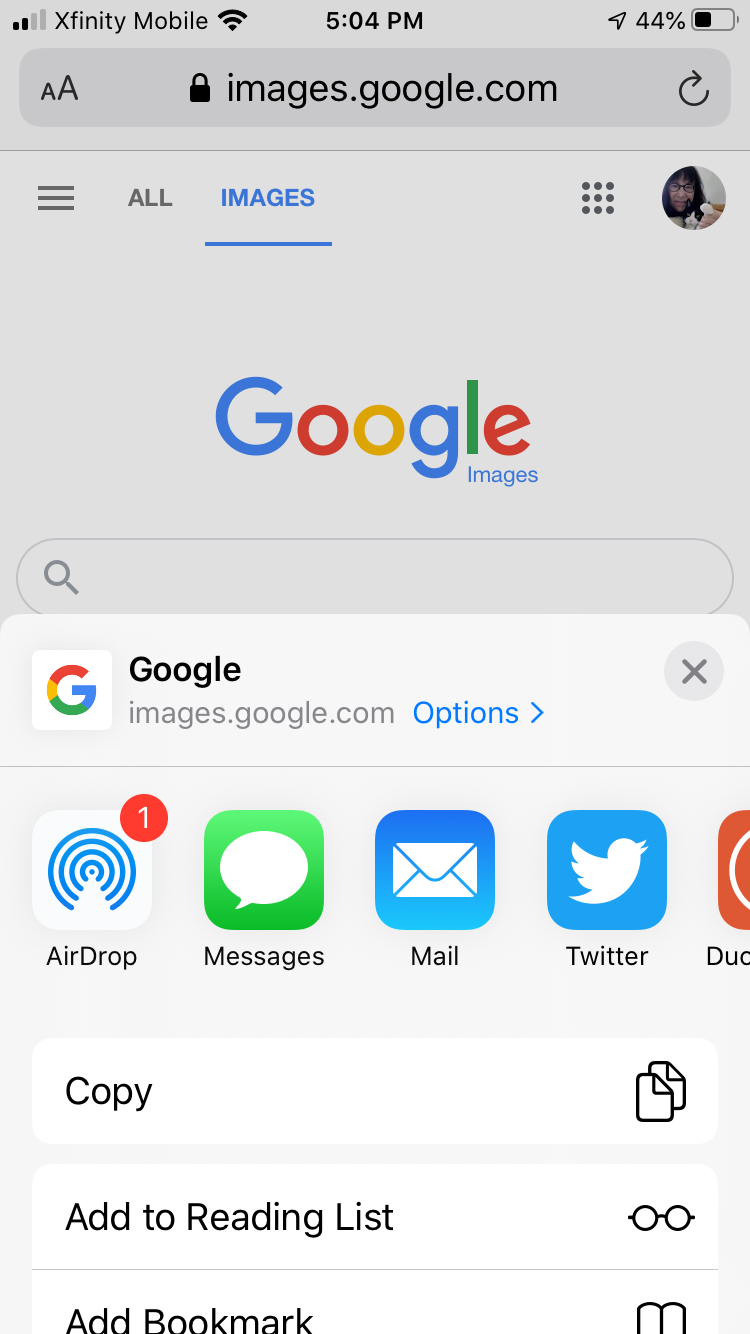
Safari, the default web browser on iPhone, offers a built-in feature that allows users to perform reverse image searches. This feature, called “Search Google for Image,” allows users to search for images based on a reference image.
To use Safari’s reverse image search feature, follow these steps:
1. Open Safari on your iPhone and navigate to the webpage that contains the image you want to search for.
2. Tap and hold on the image until a menu appears.
3. Tap “Search Google for Image” from the menu.
4. Safari will then search for the image on Google and provide search results, including similar images and information about the image’s source.
Using Safari’s reverse image search feature is a convenient way to search for images on iPhone. This feature is especially useful when you come across an image on a webpage and want to learn more about it.
In addition to the “Search Google for Image” feature, Safari also allows users to access the image’s source page. To do this, follow these steps:
1. Open Safari on your iPhone and navigate to the webpage that contains the image you want to search for.
2. Tap and hold on the image until a menu appears.
3. Tap “Open in New Tab” from the menu.
4. Safari will then open the image’s source page in a new tab, allowing you to view more information about the image.
By using Safari’s reverse image search feature and accessing the image’s source page, users can unlock a wealth of information about the images they encounter on the web.
Tips and Tricks for Effective Reverse Image Search on iPhone
Reverse image search on iPhone can be a powerful tool for identifying unknown images, finding similar pictures, or tracking down the source of an image. However, to get the most out of this feature, it’s essential to use it effectively. Here are some tips and tricks to help you get the most out of reverse image search on iPhone:
1. Use keywords: When performing a reverse image search, use relevant keywords to help narrow down the search results. This can include the name of the object, location, or any other relevant information.
2. Filter results: Most reverse image search tools, including Google Lens and TinEye, allow you to filter results based on factors such as image size, color, and orientation. Use these filters to narrow down the search results and find the most relevant images.
3. Verify image authenticity: When using reverse image search, it’s essential to verify the authenticity of the images that appear in the search results. Look for images that are high-quality and have a clear source attribution.
4. Use multiple search tools: Don’t rely on just one reverse image search tool. Try using multiple tools, such as Google Lens and TinEye, to see which one provides the most accurate results.
5. Experiment with different images: Don’t be afraid to experiment with different images to see which ones produce the best results. Try using different angles, lighting conditions, and image sizes to see how they affect the search results.
By following these tips and tricks, you can get the most out of reverse image search on iPhone and unlock a wealth of information about the images you encounter.
Additionally, it’s essential to understand the limitations of reverse image search. While this feature can be incredibly powerful, it’s not foolproof. Some images may not produce any results, while others may produce inaccurate or misleading results.
Despite these limitations, reverse image search remains a valuable tool for anyone looking to learn more about the images they encounter. By using this feature effectively and understanding its limitations, you can unlock a wealth of information and gain a deeper understanding of the world around you.
Common Use Cases for Reverse Image Search on iPhone
Reverse image search on iPhone can be used in a variety of ways, depending on the user’s needs and goals. Here are some common use cases for reverse image search on iPhone:
1. Identifying unknown objects: Reverse image search can be used to identify unknown objects, such as plants, animals, or products. Simply take a photo of the object and use a reverse image search tool to identify it.
2. Finding similar products: Reverse image search can be used to find similar products or images. For example, if you see a product you like in a store or online, you can take a photo of it and use a reverse image search tool to find similar products.
3. Tracking down the source of a meme: Reverse image search can be used to track down the source of a meme or image. Simply take a screenshot of the meme and use a reverse image search tool to find the original source.
4. Identifying artwork: Reverse image search can be used to identify artwork, such as paintings or sculptures. Simply take a photo of the artwork and use a reverse image search tool to identify it.
5. Finding similar images: Reverse image search can be used to find similar images. For example, if you’re looking for images of a particular location or object, you can use a reverse image search tool to find similar images.
These are just a few examples of the many use cases for reverse image search on iPhone. By using this feature, users can unlock a wealth of information and gain a deeper understanding of the world around them.
Reverse image search can also be used in a variety of industries, such as:
1. Fashion: Reverse image search can be used to identify clothing and accessories, and to find similar products.
2. Art: Reverse image search can be used to identify artwork, and to find similar images.
3. Education: Reverse image search can be used to identify objects and images, and to find similar images for educational purposes.
4. Marketing: Reverse image search can be used to identify products and images, and to find similar images for marketing purposes.
Reverse Image Search on iPhone: A Step-by-Step Guide
Performing a reverse image search on iPhone is a straightforward process that can be completed in just a few steps. Here’s a step-by-step guide on how to do it:
Step 1: Open the Google Lens app on your iPhone. You can find it on the home screen or in the app library.
Step 2: Tap the camera icon in the bottom center of the screen to take a new photo or select an existing one from your camera roll.
Step 3: If you’re taking a new photo, point the camera at the object or image you want to search for and tap the shutter button. If you’re selecting an existing photo, choose the one you want to use and tap “Next”.
Step 4: Google Lens will analyze the image and provide search results, including similar images and information about the object or image.
Step 5: Tap on a search result to view more information about the object or image. You can also tap the “Share” icon to share the image with others or save it to your camera roll.
Alternatively, you can use Safari’s built-in reverse image search feature to perform a search. Here’s how:
Step 1: Open Safari on your iPhone and navigate to the webpage that contains the image you want to search for.
Step 2: Tap and hold on the image until a menu appears.
Step 3: Tap “Search Google for Image” from the menu.
Step 4: Safari will search for the image on Google and provide search results, including similar images and information about the object or image.
Step 5: Tap on a search result to view more information about the object or image. You can also tap the “Share” icon to share the image with others or save it to your camera roll.
By following these steps, you can perform a reverse image search on iPhone and unlock a wealth of information about the images you encounter.
Conclusion: Unlocking the Full Potential of Reverse Image Search on iPhone
Reverse image search on iPhone is a powerful tool that can be used to identify unknown images, find similar pictures, or track down the source of an image. By using Google Lens, Safari’s built-in features, or third-party apps such as TinEye or Reversee, users can unlock a wealth of information about the images they encounter.
Throughout this article, we have explored the concept of reverse image search, its benefits, and how to use it on iPhone. We have also discussed alternative methods for reverse image search, including using third-party apps and Safari’s built-in features.
In addition, we have provided tips and tricks for getting the most out of reverse image search on iPhone, including how to use keywords, filter results, and verify image authenticity. We have also discussed common use cases for reverse image search on iPhone, such as identifying unknown objects, finding similar products, or tracking down the source of a meme.
By following the steps outlined in this article, users can unlock the full potential of reverse image search on iPhone and gain a deeper understanding of the world around them. Whether you’re a student, researcher, or simply someone who wants to learn more about the images you encounter, reverse image search on iPhone is a powerful tool that can help you achieve your goals.
So why not give it a try? Use reverse image search on iPhone to unlock a wealth of information about the images you encounter, and discover new ways to learn, explore, and understand the world around you.


