Understanding the Importance of Image Compression
When it comes to optimizing images for web use, reducing image file size is crucial for improving page loading times, enhancing user experience, and boosting search engine optimization (SEO). Large image files can significantly slow down website loading times, leading to higher bounce rates, lower engagement, and a negative impact on search engine rankings. By compressing images, website owners can reduce the file size of their images without sacrificing quality, resulting in faster page loading times and a better user experience.
According to Google, page loading times are a key factor in determining search engine rankings. Websites with faster loading times are more likely to rank higher in search engine results pages (SERPs). Additionally, a study by Amazon found that every 1-second delay in page loading times can result in a 7% reduction in sales. By compressing images, website owners can improve page loading times, increase engagement, and drive more sales.
Furthermore, compressing images can also help to reduce bandwidth usage and improve website performance. Large image files can consume a significant amount of bandwidth, leading to increased hosting costs and slower website performance. By compressing images, website owners can reduce bandwidth usage, improve website performance, and save on hosting costs.
So, how can you reduce image size without losing quality? The key is to use the right image compression techniques and tools. By understanding the importance of image compression and using the right techniques and tools, website owners can reduce image file size, improve page loading times, and enhance user experience.
Choosing the Right Image Format for Compression
When it comes to compressing images, selecting the right image format is crucial for achieving the best results without sacrificing quality. Different image formats have varying levels of compression capabilities, and choosing the wrong format can lead to poor image quality or ineffective compression.
One of the most popular image formats for web use is JPEG (Joint Photographic Experts Group). JPEG is a lossy compression format, which means that it discards some of the image data to reduce the file size. JPEG is ideal for compressing photographs and other images with many colors, as it can achieve high compression ratios without significantly affecting image quality.
Another popular image format is PNG (Portable Network Graphics). PNG is a lossless compression format, which means that it preserves all of the image data and does not discard any information. PNG is ideal for compressing images with transparent backgrounds, such as logos and icons, as it can maintain the transparency and achieve high compression ratios.
GIF (Graphics Interchange Format) is another popular image format, but it is not ideal for compressing images with many colors. GIF is a lossless compression format, but it is limited to 256 colors, which can lead to poor image quality if used for compressing images with many colors.
When choosing an image format for compression, consider the type of image you are working with and the desired level of compression. If you need to compress images with many colors, JPEG may be the best choice. If you need to compress images with transparent backgrounds, PNG may be the best choice. By selecting the right image format, you can achieve the best results when compressing images and reduce the file size without sacrificing quality.
For example, if you want to reduce the image size of a photograph without losing quality, you can use JPEG compression. By compressing the image using JPEG, you can reduce the file size by up to 90% without significantly affecting the image quality. This is especially useful for web use, as it can improve page loading times and enhance user experience.
How to Reduce Image Size using Image Editing Software
Image editing software like Adobe Photoshop and GIMP can be used to reduce image size while maintaining quality. These software programs offer a range of tools and features that can help to compress images without sacrificing quality.
To reduce image size using Adobe Photoshop, follow these steps:
1. Open the image in Adobe Photoshop and go to “File” > “Export” > “Export As”.
2. Select the desired file format, such as JPEG or PNG, and choose the desired compression settings.
3. Use the “Quality” slider to adjust the compression level. A lower quality setting will result in a smaller file size, but may also affect image quality.
4. Click “Export” to save the compressed image.
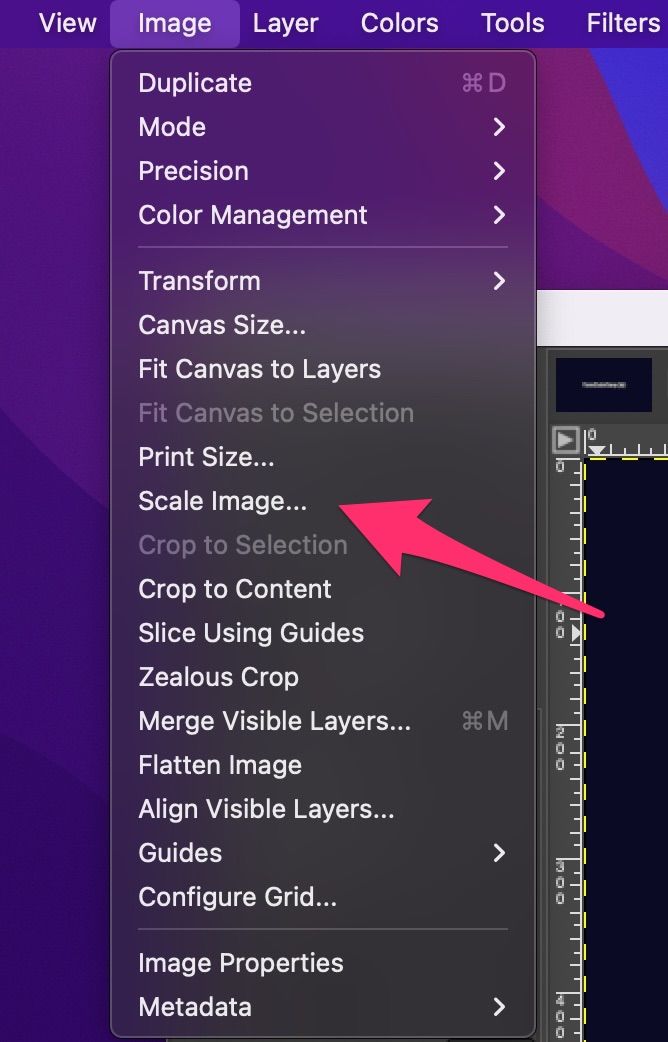
To reduce image size using GIMP, follow these steps:
1. Open the image in GIMP and go to “File” > “Export As”.
2. Select the desired file format, such as JPEG or PNG, and choose the desired compression settings.
3. Use the “Quality” slider to adjust the compression level. A lower quality setting will result in a smaller file size, but may also affect image quality.
4. Click “Export” to save the compressed image.
When using image editing software to reduce image size, it’s essential to find the right balance between compression and quality. Over-compression can result in poor image quality, while under-compression may not achieve the desired file size reduction.
By following these steps and using the right compression settings, you can reduce image size without losing quality using image editing software like Adobe Photoshop and GIMP.
For example, if you want to reduce the image size of a photograph without losing quality, you can use Adobe Photoshop to compress the image using the JPEG format. By adjusting the quality settings and using the right compression algorithm, you can achieve a significant reduction in file size without affecting image quality.
Using Online Tools for Image Compression
Online tools like TinyPNG and ShortPixel can be used to compress images without sacrificing quality. These tools use advanced algorithms to reduce the file size of images while maintaining their original quality.
TinyPNG is a popular online tool that uses a combination of lossy and lossless compression algorithms to reduce the file size of PNG images. To use TinyPNG, simply upload your image to the website and select the desired compression level. TinyPNG will then compress the image and provide a download link for the compressed file.
ShortPixel is another online tool that offers advanced image compression capabilities. ShortPixel uses a combination of lossy and lossless compression algorithms to reduce the file size of images, and also offers features like image resizing and cropping. To use ShortPixel, simply upload your image to the website and select the desired compression level and image settings.
Using online tools like TinyPNG and ShortPixel can be a convenient and efficient way to compress images without sacrificing quality. These tools are often free or low-cost, and can be used to compress images in a matter of seconds.
When using online tools for image compression, it’s essential to select the right compression level and image settings to achieve the desired results. Over-compression can result in poor image quality, while under-compression may not achieve the desired file size reduction.
By using online tools like TinyPNG and ShortPixel, you can reduce image size without losing quality and improve the overall performance of your website. For example, if you want to reduce the image size of a photograph without losing quality, you can use TinyPNG to compress the image using the JPEG format. By selecting the right compression level and image settings, you can achieve a significant reduction in file size without affecting image quality.
Best Practices for Image Compression
When it comes to image compression, there are several best practices to keep in mind to ensure that you achieve the best results without sacrificing quality. Here are some tips to help you get started:
1. Save images in the correct format: Different image formats are better suited for different types of images. For example, JPEG is best for photographs, while PNG is better for images with transparent backgrounds.
2. Use the right compression settings: The compression settings you use will depend on the type of image you are compressing and the desired level of compression. Experiment with different settings to find the right balance between compression and quality.
3. Avoid over-compression: Over-compression can result in poor image quality, so it’s essential to find the right balance between compression and quality. Use image editing software or online tools to compress images, and test the results to ensure that the image quality is not compromised.
4. Test image quality: Before compressing an image, test its quality to ensure that it meets your standards. Use image editing software or online tools to check the image’s resolution, color depth, and other factors that can affect its quality.
5. Use image compression algorithms wisely: Different image compression algorithms have different strengths and weaknesses. Use lossy compression algorithms like JPEG for photographs, and lossless compression algorithms like PNG for images with transparent backgrounds.
By following these best practices, you can ensure that your images are compressed effectively without sacrificing quality. Remember to always test image quality before compressing an image, and use the right compression settings and algorithms to achieve the best results.
For example, if you want to reduce the image size of a photograph without losing quality, you can use the JPEG format and adjust the compression settings to achieve the desired level of compression. By following these best practices, you can ensure that your images are compressed effectively and maintain their original quality.
Comparing Image Compression Algorithms
Image compression algorithms are used to reduce the file size of images while maintaining their quality. There are two main types of image compression algorithms: lossy and lossless.
Lossy compression algorithms, such as JPEG, discard some of the image data to reduce the file size. This can result in a loss of image quality, but it can also achieve high compression ratios. Lossy compression is best suited for images with many colors, such as photographs.
Lossless compression algorithms, such as PNG, preserve all of the image data and do not discard any information. This results in a smaller file size without any loss of image quality. Lossless compression is best suited for images with transparent backgrounds, such as logos and icons.
Other image compression algorithms, such as GIF, use a combination of lossy and lossless compression techniques. GIF is best suited for images with a limited color palette, such as animations and graphics.
When choosing an image compression algorithm, it’s essential to consider the type of image you are compressing and the desired level of compression. By selecting the right algorithm, you can achieve the best results without sacrificing image quality.
For example, if you want to reduce the image size of a photograph without losing quality, you can use the JPEG algorithm. By adjusting the compression settings, you can achieve a high compression ratio without sacrificing image quality.
In contrast, if you want to compress an image with a transparent background, such as a logo, you can use the PNG algorithm. This will preserve the image quality and achieve a smaller file size without any loss of data.
Real-World Examples of Effective Image Compression
Many websites and applications have successfully implemented image compression techniques to improve their performance and user experience. Here are a few examples:
The New York Times, for example, uses image compression to reduce the file size of their images without sacrificing quality. By using a combination of lossy and lossless compression algorithms, they are able to achieve a significant reduction in file size while maintaining the high-quality images that their readers expect.
Another example is the website of the popular online retailer, Amazon. Amazon uses image compression to reduce the file size of their product images, which helps to improve page loading times and enhance the overall user experience.
In addition to these examples, many other websites and applications have also successfully implemented image compression techniques to improve their performance and user experience. By using the right image compression algorithms and techniques, it is possible to achieve a significant reduction in file size without sacrificing image quality.
For example, if you want to reduce the image size of a photograph without losing quality, you can use the JPEG algorithm and adjust the compression settings to achieve the desired level of compression. By doing so, you can achieve a significant reduction in file size while maintaining the high-quality image that your users expect.
By following the examples of these successful websites and applications, you can also implement effective image compression techniques to improve your website’s performance and user experience.
Common Mistakes to Avoid when Reducing Image Size
When reducing image size, there are several common mistakes to avoid in order to ensure that the image quality is not compromised. Here are some of the most common mistakes to watch out for:
1. Over-compression: Over-compression can result in a significant loss of image quality, making the image appear pixelated or blurry. To avoid over-compression, use the right compression settings and test the image quality before saving.
2. Incorrect format selection: Choosing the wrong image format can result in poor image quality or ineffective compression. Make sure to select the right format for the type of image you are compressing, such as JPEG for photographs or PNG for images with transparent backgrounds.
3. Neglecting to test image quality: Failing to test the image quality after compression can result in poor image quality or ineffective compression. Always test the image quality before saving to ensure that it meets your standards.
4. Using the wrong compression algorithm: Using the wrong compression algorithm can result in poor image quality or ineffective compression. Make sure to use the right algorithm for the type of image you are compressing, such as lossy compression for photographs or lossless compression for images with transparent backgrounds.
By avoiding these common mistakes, you can ensure that your images are compressed effectively without sacrificing quality. Remember to always test the image quality before saving and use the right compression settings and algorithms to achieve the best results.
For example, if you want to reduce the image size of a photograph without losing quality, make sure to use the right compression settings and test the image quality before saving. By doing so, you can achieve a significant reduction in file size while maintaining the high-quality image that your users expect.


