Why You Need to Download Images from Google Docs
Google Docs is a powerful tool for creating and editing documents online. However, when it comes to working with images, users often need to download them for various purposes, such as using them in other documents, presentations, or websites. Downloading images from Google Docs is essential for several reasons. Firstly, Google Docs has limitations when it comes to image editing and manipulation. While it offers basic image editing tools, users may need to use more advanced image editing software to enhance or modify their images. By downloading images from Google Docs, users can edit them using their preferred image editing software and then re-upload them to Google Docs if needed.
Additionally, downloading images from Google Docs allows users to have a local copy of their images, which can be useful for backup purposes or for sharing with others. Moreover, downloading images can also help users to avoid any potential issues related to image formatting or compatibility when sharing documents or presentations with others. In this article, we will explore the different methods for downloading images from Google Docs, including the use of the “Download” option, the Google Docs revision history, and Google Drive.
Before we dive into the methods, it’s essential to understand the importance of downloading images from Google Docs. By doing so, users can ensure that they have control over their images and can use them as needed. Whether you’re a student, a professional, or a business owner, downloading images from Google Docs can help you to work more efficiently and effectively. In the next section, we will explore how Google Docs stores images and how this affects the process of downloading them.
Understanding Google Docs Image Storage
Google Docs stores images in a unique way, using Google Drive as the underlying storage system. When you upload an image to Google Docs, it is stored in your Google Drive account, and a link to the image is inserted into your document. This means that the image is not actually stored within the Google Docs document itself, but rather as a separate file in your Google Drive account.
This storage system has both benefits and limitations. On the one hand, it allows you to easily share and collaborate on documents that contain images, as the images are stored separately and can be accessed by multiple users. On the other hand, it can lead to issues with image formatting and compatibility, as the image is stored as a separate file and may not be optimized for use within a Google Docs document.
Another limitation of Google Docs image storage is the storage space available. Google Drive offers a limited amount of free storage space, and if you exceed this limit, you may need to upgrade to a paid plan or delete some of your files to free up space. This can be a problem if you need to store a large number of images in your Google Docs documents.
Understanding how Google Docs stores images is essential for downloading them effectively. In the next section, we will explore the different methods for downloading images from Google Docs, including the use of the “Download” option, the Google Docs revision history, and Google Drive.
Method 1: Downloading Images Directly from Google Docs
One of the simplest ways to download images from Google Docs is to use the “Download” option. This method allows you to download the image in its original format, without having to worry about converting it to a different file type.
To download an image directly from Google Docs, follow these steps:
1. Open your Google Docs document and select the image you want to download.
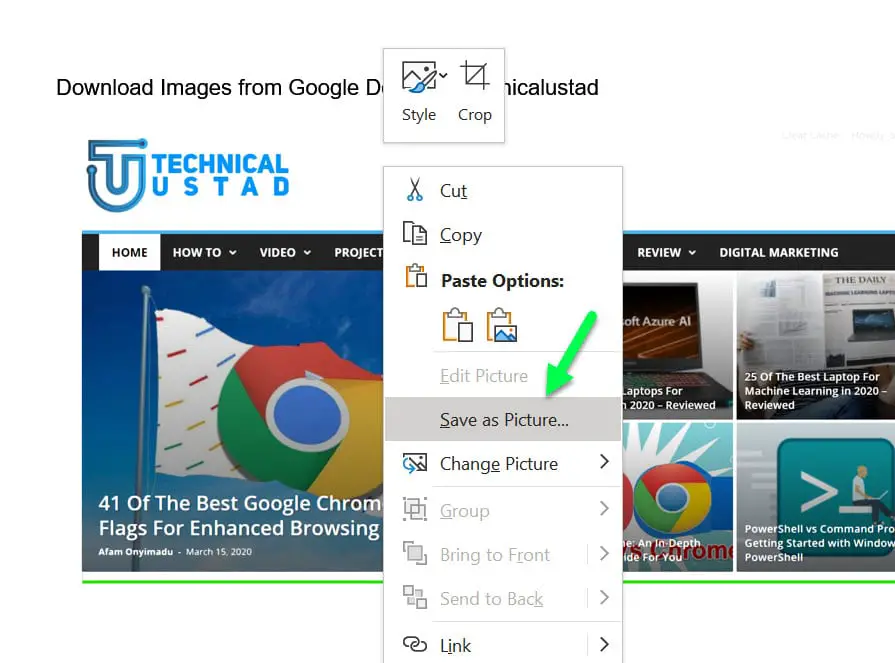
2. Right-click on the image and select “Download” from the drop-down menu.
3. Choose the file format you want to download the image in. Google Docs allows you to download images in JPEG, PNG, GIF, and BMP formats.
4. Click on the “Download” button to save the image to your computer.
This method is quick and easy, but it’s worth noting that the image will be downloaded in its original size and resolution. If you need to resize or compress the image, you may need to use a separate image editing software.
Additionally, if you’re downloading multiple images from a single document, you may want to consider using the “Download as” option, which allows you to download all the images in the document at once. To do this, follow these steps:
1. Open your Google Docs document and select all the images you want to download.
2. Right-click on one of the selected images and select “Download as” from the drop-down menu.
3. Choose the file format you want to download the images in.
4. Click on the “Download” button to save the images to your computer.
This method can save you time and effort if you need to download multiple images from a single document.
Method 2: Using the Google Docs Revision History
The Google Docs revision history is a powerful tool that allows you to track changes made to a document over time. It also provides a way to download previous versions of an image, which can be useful if you need to recover a deleted image or revert to a previous version of an image.
To use the Google Docs revision history to download an image, follow these steps:
1. Open your Google Docs document and click on the “File” menu.
2. Select “See revision history” from the drop-down menu.
3. In the revision history panel, click on the “Restore this version” button next to the version of the image you want to download.
4. Right-click on the image and select “Download” from the drop-down menu.
5. Choose the file format you want to download the image in and click on the “Download” button.
This method is particularly useful if you need to recover a deleted image or if you want to compare different versions of an image. The revision history also provides a record of all changes made to the document, including who made the changes and when.
One of the benefits of using the revision history to download images is that it allows you to access previous versions of an image without having to manually save each version. This can be a time-saving feature, especially if you are working on a document with multiple images.
Additionally, the revision history provides a way to collaborate with others on a document. By using the revision history, you can see who made changes to the document and when, which can help to facilitate communication and collaboration.
Method 3: Using Google Drive to Download Images
Google Drive is a powerful tool that allows you to store and manage your files, including images. You can use Google Drive to download images from Google Docs, and it’s a great way to access your images from anywhere.
To use Google Drive to download images from Google Docs, follow these steps:
1. Open your Google Docs document and select the image you want to download.
2. Right-click on the image and select “Get link” from the drop-down menu.
3. Click on the “Get link” button to generate a link to the image.
4. Copy the link and paste it into your web browser’s address bar.
5. Press Enter to open the image in your web browser.
6. Right-click on the image and select “Save image as” from the drop-down menu.
7. Choose the file format you want to save the image in and click on the “Save” button.
This method is particularly useful if you need to share images with others or if you want to access your images from anywhere. By using Google Drive, you can easily share images with others and collaborate on documents.
One of the benefits of using Google Drive to download images is that it allows you to access your images from anywhere. You can access your Google Drive account from any device with an internet connection, making it easy to share and collaborate on documents.
Additionally, Google Drive provides a way to organize your images in folders and subfolders, making it easy to find and manage your images. You can also use Google Drive to compress images to reduce file size, making it easier to share and download images.
Troubleshooting Common Issues
When downloading images from Google Docs, users may encounter several issues that can hinder the process. Here are some common problems and their solutions:
Image Quality Issues: If the downloaded image appears pixelated or of poor quality, it may be due to the image’s original resolution or the file format used. To resolve this, try downloading the image in a different file format, such as PNG or JPEG, which may offer better quality. Additionally, check the image’s original resolution in Google Docs and adjust it if necessary.
File Format Issues: Google Docs may not always download images in the desired file format. To overcome this, use the “Download as” option and select the preferred file format. If the desired format is not available, consider using a third-party file conversion tool to convert the image to the required format.
Storage Space Issues: If Google Docs storage space is limited, users may encounter issues when downloading large images. To resolve this, consider upgrading the Google Drive storage plan or deleting unnecessary files to free up space. Alternatively, use the Google Docs revision history to download previous versions of the image, which may be smaller in size.
Image Not Downloading: If the image fails to download, check the internet connection and ensure that the Google Docs account is active. Also, verify that the image is not copyrighted or restricted, as this may prevent downloading. If the issue persists, try using a different browser or clearing the browser’s cache.
How to Download a Image from Google Docs: To avoid common issues, it is essential to understand the correct procedure for downloading images from Google Docs. By following the methods outlined in this article, users can efficiently download images and avoid potential problems.
By being aware of these common issues and their solutions, users can troubleshoot problems and successfully download images from Google Docs. This knowledge will enable them to work efficiently with images in Google Docs and avoid potential pitfalls.
Best Practices for Downloading Images from Google Docs
When downloading images from Google Docs, it’s essential to follow best practices to ensure efficient and organized image management. Here are some tips to help you get the most out of your image downloads:
Use Descriptive File Names: When downloading images, use descriptive file names that include relevant keywords, such as the image’s content, date, or project name. This helps with easy identification and organization of images, making it simpler to find and use them in the future.
Organize Images in Folders: Create separate folders for different projects or categories to store downloaded images. This keeps your images organized, making it easier to locate and manage them. Consider creating subfolders for specific image types, such as logos, icons, or graphics.
Compress Images to Reduce File Size: Large image files can take up significant storage space and slow down your workflow. Consider compressing images to reduce file size, making them easier to share and store. Tools like TinyPNG or ImageOptim can help compress images without compromising quality.
Use the Correct File Format: Choose the right file format for your downloaded images, depending on the intended use. For example, use JPEG for photographs, PNG for graphics and logos, and GIF for animations. This ensures that your images are optimized for their intended purpose.
Backup Your Images: Regularly backup your downloaded images to prevent loss in case of technical issues or accidental deletion. Consider using cloud storage services like Google Drive, Dropbox, or OneDrive to store and sync your images across devices.
How to Download a Image from Google Docs: By following these best practices, you can efficiently download and manage images from Google Docs, making it easier to work with images in your documents, presentations, and websites.
By implementing these best practices, you can streamline your image management workflow, reduce storage space, and improve collaboration with others. This will help you work more efficiently with images in Google Docs and achieve your goals.
Conclusion: Mastering Image Downloads from Google Docs
Downloading images from Google Docs is a straightforward process that can be accomplished using various methods. By understanding the different techniques outlined in this article, users can efficiently extract images from Google Docs and use them in other documents, presentations, or websites.
Whether you need to download images directly from Google Docs, use the revision history to recover deleted images, or utilize Google Drive to share images with others, this guide has provided a comprehensive overview of the process. By following the steps and best practices outlined in this article, you can master the art of downloading images from Google Docs.
Remember, understanding how to download images from Google Docs is crucial for working efficiently with images in your documents and presentations. By applying the knowledge gained from this article, you can streamline your workflow, reduce storage space, and improve collaboration with others.
In conclusion, downloading images from Google Docs is a simple yet powerful process that can enhance your productivity and creativity. By mastering the different methods and best practices outlined in this article, you can unlock the full potential of Google Docs and take your image management skills to the next level.
Now that you know how to download a image from Google Docs, you can confidently work with images in your documents and presentations, knowing that you have the skills and knowledge to extract and manage them efficiently.


