Getting Started with Canva: A Brief Overview
Canva is a popular graphic design platform that has revolutionized the way designers and non-designers create and edit visual content. With its user-friendly interface and drag-and-drop functionality, Canva has made it easy for anyone to create professional-looking designs without extensive design experience. From social media graphics and presentations to infographics and marketing materials, Canva’s versatility and flexibility have made it a go-to tool for creatives and businesses alike.
One of the key reasons Canva has become so popular is its ease of use. The platform’s intuitive interface makes it easy to navigate and find the tools and features you need to create your design. Whether you’re a seasoned designer or just starting out, Canva’s tutorials and guides provide a comprehensive introduction to the platform’s features and functionality.
Canva’s popularity can also be attributed to its vast template library and design assets. With thousands of pre-made templates and design elements to choose from, users can quickly and easily create designs that are tailored to their specific needs. From logos and icons to fonts and images, Canva’s design assets provide a wealth of creative possibilities.
For those looking to learn how to add watermark on Canva, understanding the platform’s basics is essential. By familiarizing yourself with Canva’s interface and features, you’ll be able to create and edit designs with confidence. In the next section, we’ll explore the process of uploading your design to Canva and preparing it for watermarking.
Uploading Your Design to Canva: Preparing for Watermarking
Uploading your design to Canva is a straightforward process that requires a few simple steps. To get started, navigate to Canva’s dashboard and click on the “Create a design” button. From there, select the type of design you want to create, such as a graphic, presentation, or social media post.
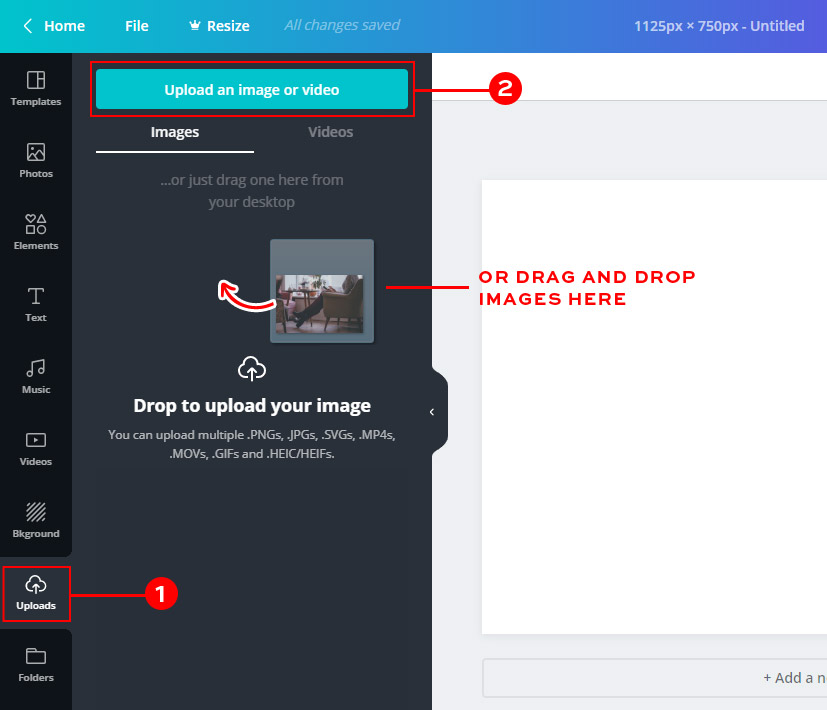
Once you’ve selected your design type, you’ll be prompted to upload your design file. Canva supports a wide range of file formats, including PNG, JPEG, and PDF. Make sure to choose a file format that is compatible with your design and Canva’s requirements.
When uploading your design, pay attention to the image size and resolution. Canva recommends using images with a minimum resolution of 72 dpi and a maximum file size of 50MB. If your image is too large, you can resize it using Canva’s built-in image editing tools.
After uploading your design, you’ll be taken to Canva’s design editor. This is where you can customize your design, add text and images, and prepare it for watermarking. Take some time to familiarize yourself with Canva’s design editor and its various features, such as the toolbar, layers panel, and design elements.
Now that your design is uploaded and ready to go, it’s time to add a watermark. In the next section, we’ll walk you through the process of adding a watermark to your design on Canva, including how to upload a watermark image, adjust opacity, and position the watermark.
Adding a Watermark to Your Design: Step-by-Step Instructions
To add a watermark to your design on Canva, follow these step-by-step instructions. First, navigate to the design editor and click on the “Elements” tab. From there, select the “Watermark” option and choose from a variety of pre-made watermark templates or upload your own custom watermark image.
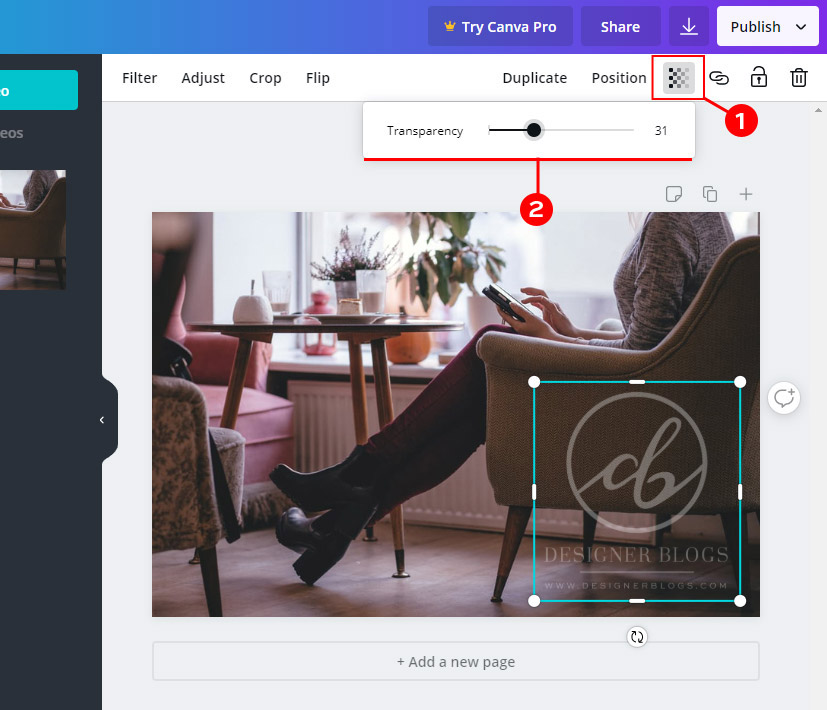
Once you’ve selected your watermark, adjust the opacity by clicking on the “Opacity” slider. This will allow you to control the visibility of your watermark, making it more or less prominent depending on your design needs.
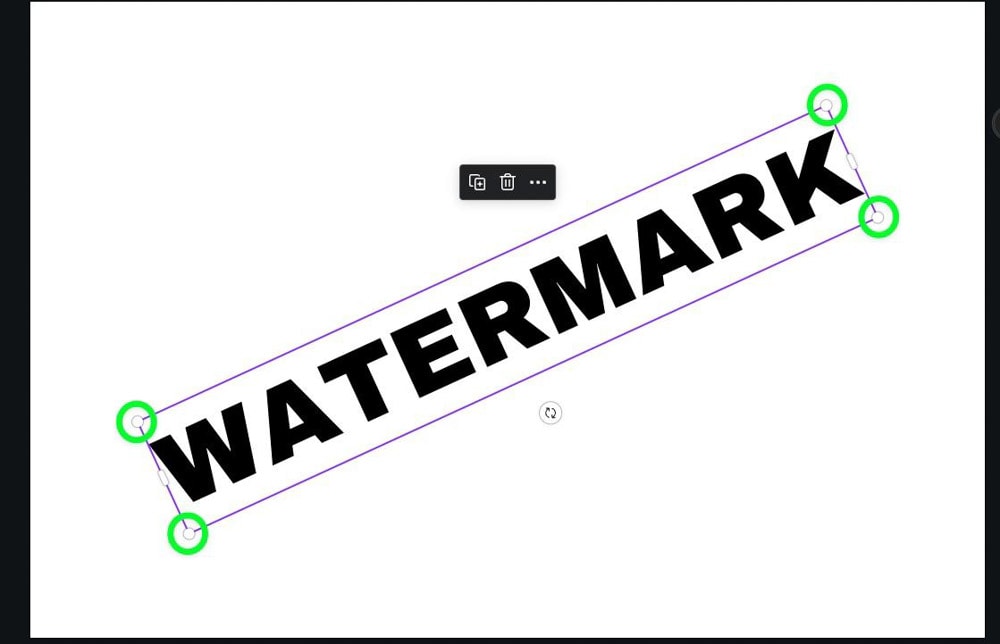
Next, position your watermark by clicking and dragging it to the desired location on your design. You can also use the “Align” tool to align your watermark with other elements on your design.
For more advanced watermarking options, use Canva’s layering and blending modes to create a unique and customized watermark. This can be done by clicking on the “Layer” tab and selecting the “Blending modes” option.
When adding a watermark to your design, it’s essential to balance visibility and subtlety. A watermark that is too prominent can be distracting, while a watermark that is too subtle may not provide adequate protection for your design.
By following these step-by-step instructions, you can add a professional-looking watermark to your design on Canva. In the next section, we’ll explore tips and tricks for customizing your watermark, including how to change the font, color, and size of the watermark text.
Customizing Your Watermark: Tips and Tricks
Once you’ve added a watermark to your design on Canva, you can customize it to fit your brand’s style and aesthetic. One way to do this is by changing the font of your watermark text. Canva offers a wide range of fonts to choose from, including popular fonts like Arial, Helvetica, and Times New Roman.
To change the font of your watermark text, simply click on the “Text” tab and select the font you want to use from the dropdown menu. You can also adjust the size and color of your watermark text by using the “Size” and “Color” sliders.
Another way to customize your watermark is by using Canva’s advanced features, such as layering and blending modes. By layering your watermark on top of other design elements, you can create a unique and eye-catching effect. Blending modes can also be used to merge your watermark with other design elements, creating a seamless and professional-looking finish.
When customizing your watermark, it’s essential to balance creativity with legibility. Make sure your watermark is easy to read and understand, even when it’s scaled down or viewed on different devices.
By customizing your watermark on Canva, you can add a personal touch to your designs and protect your intellectual property. In the next section, we’ll discuss best practices for watermarking on Canva, including how to balance visibility and subtlety, how to avoid over-watermarking, and how to ensure the watermark is legible.
Best Practices for Watermarking on Canva
When it comes to watermarking on Canva, there are several best practices to keep in mind to ensure that your watermark is effective and professional-looking. One of the most important things to consider is the balance between visibility and subtlety. A watermark that is too prominent can be distracting, while a watermark that is too subtle may not provide adequate protection for your design.
To achieve the right balance, consider using a watermark that is slightly transparent or faded. This will allow your design to remain visible while still providing a clear indication of ownership. Additionally, consider using a watermark that is placed in a corner or along the edge of your design, rather than in the center. This will help to avoid distracting from the main content of your design.
Another important consideration is the size and resolution of your watermark. Make sure that your watermark is large enough to be legible, but not so large that it overwhelms your design. Additionally, consider using a high-resolution watermark to ensure that it remains clear and sharp, even when scaled down or viewed on different devices.
Finally, consider using a consistent watermark across all of your designs. This will help to establish your brand identity and make it easier to recognize your work. By following these best practices, you can create a professional-looking watermark that protects your intellectual property and enhances your design workflow.
For more information on how to add watermark on Canva, including step-by-step instructions and tips for customizing your watermark, be sure to check out the rest of this article.
Troubleshooting Common Watermarking Issues on Canva
When adding a watermark to your design on Canva, you may encounter some common issues that can affect the appearance and effectiveness of your watermark. One of the most common issues is image distortion, which can occur when your watermark image is not optimized for the design. To resolve this issue, try resizing your watermark image to match the resolution of your design.
Another common issue is incorrect positioning of the watermark. To avoid this, make sure to use the “Position” tool in Canva’s design editor to adjust the placement of your watermark. You can also use the “Align” tool to align your watermark with other design elements.
Font rendering problems can also occur when adding a watermark to your design. To resolve this issue, try using a different font or adjusting the font size and style. You can also use Canva’s “Text” tool to adjust the font rendering settings.
By troubleshooting common watermarking issues on Canva, you can ensure that your watermark is effective and professional-looking. Remember to always test your watermark before finalizing your design to ensure that it meets your needs.
For more information on how to add watermark on Canva, including step-by-step instructions and tips for customizing your watermark, be sure to check out the rest of this article.
Conclusion: Protecting Your Designs with Confidence
Watermarking your designs on Canva is a simple yet effective way to protect your intellectual property and maintain your brand identity. By following the steps outlined in this article, you can add a professional-looking watermark to your designs and safeguard them against unauthorized use.
Remember to experiment with different watermarking techniques and explore Canva’s features to enhance your design workflow. With Canva’s user-friendly interface and advanced features, you can create unique and effective watermarks that protect your designs and showcase your brand.
By protecting your designs with a watermark, you can ensure that your intellectual property is safe and your brand identity is maintained. Whether you’re a designer, business owner, or entrepreneur, watermarking your designs on Canva is an essential step in safeguarding your creative work.
For more information on how to add watermark on Canva, including step-by-step instructions and tips for customizing your watermark, be sure to check out the rest of this article. With Canva’s powerful features and user-friendly interface, you can create professional-looking designs and protect your intellectual property with confidence.


