Understanding the Role of Sidebars in WordPress
Sidebars play a crucial role in WordPress, serving as a secondary navigation area that provides additional information, navigation, and calls-to-action. A well-designed sidebar can significantly enhance user experience and improve website engagement. By understanding the importance of sidebars, website owners can unlock their full potential and create a more effective online presence.
When it comes to learning how to edit a sidebar in WordPress, it’s essential to recognize the various functions that sidebars can perform. From showcasing recent posts and comments to providing links to social media profiles, sidebars offer a flexible and customizable way to enhance website functionality. By incorporating relevant content and features, website owners can create a sidebar that complements their main content and improves overall user engagement.
Moreover, sidebars can be used to promote specific products or services, highlight special offers, or provide additional resources to users. By strategically placing calls-to-action and other interactive elements, website owners can encourage users to take specific actions, such as signing up for a newsletter or making a purchase.
As WordPress continues to evolve, the importance of sidebars remains unchanged. By understanding how to edit a sidebar in WordPress, website owners can unlock new possibilities for customization and improvement. Whether you’re looking to enhance user experience, improve website engagement, or increase conversions, a well-designed sidebar is an essential component of any successful WordPress website.
Accessing the WordPress Customizer: A Beginner’s Guide
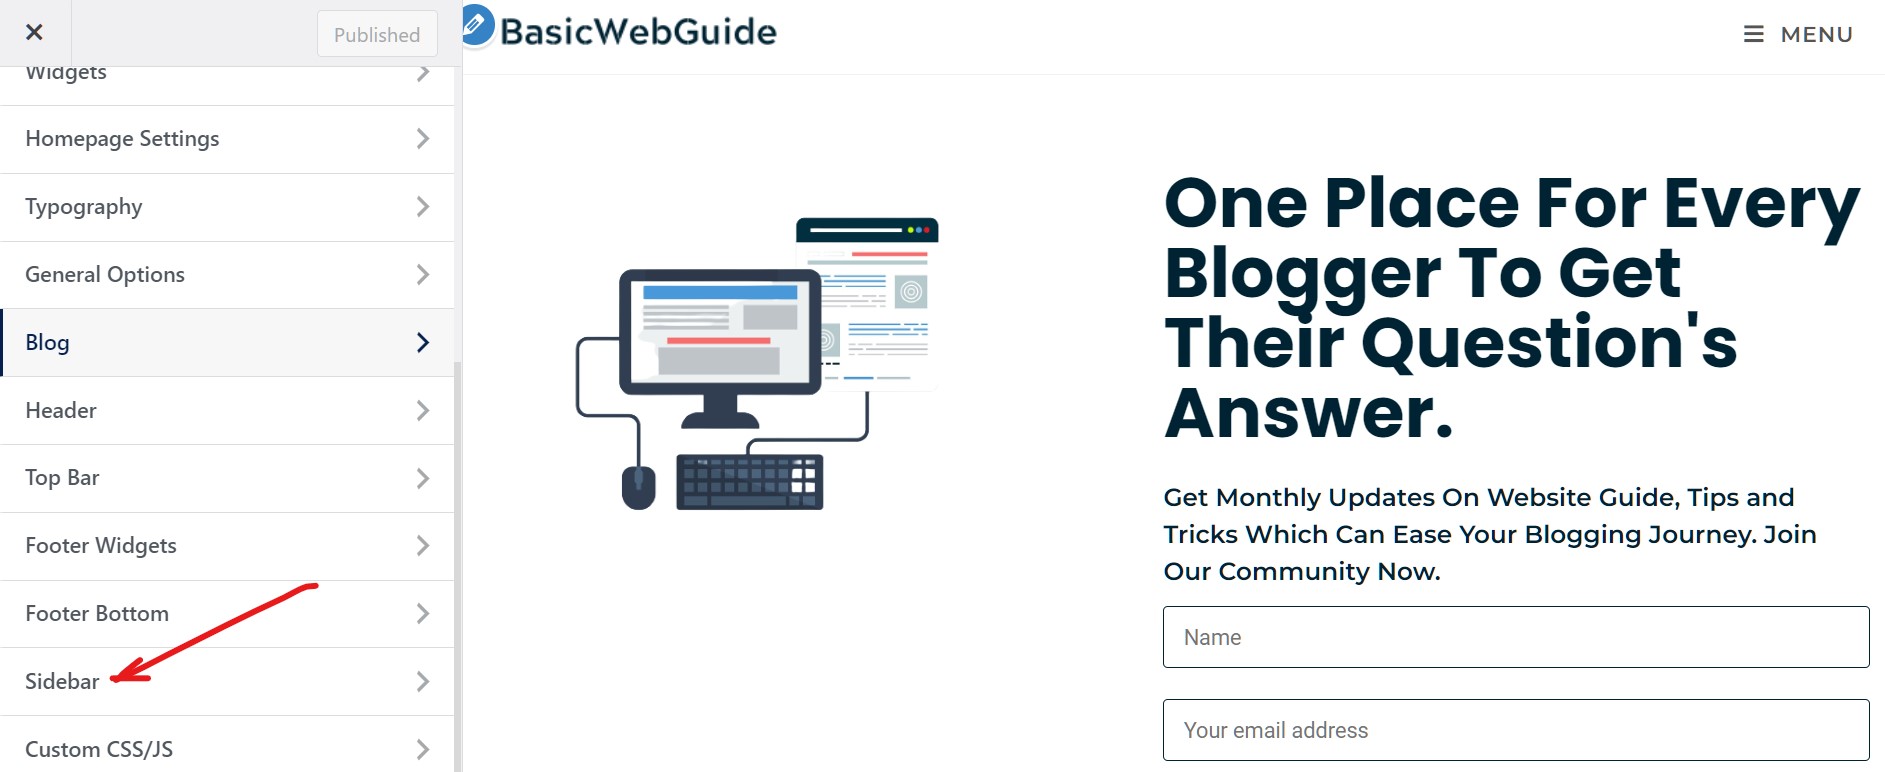
To learn how to edit a sidebar in WordPress, you’ll need to access the WordPress Customizer. The Customizer is a powerful tool that allows you to make changes to your website’s design and layout without requiring any coding knowledge. To access the Customizer, navigate to your WordPress dashboard and click on the “Appearance” tab in the left-hand menu.
From the Appearance tab, click on the “Customize” button. This will launch the Customizer dashboard, which provides a live preview of your website. The Customizer dashboard is divided into several sections, including “Site Identity,” “Colors,” “Background Image,” and “Widgets.” Each section provides a range of options and settings that allow you to customize your website’s design and layout.
For the purpose of editing your sidebar, you’ll want to focus on the “Widgets” section. This section allows you to add, remove, and configure widgets in your sidebar. Widgets are small blocks of content that can be used to display a range of information, including text, images, and links.
Before you start making changes to your sidebar, take some time to familiarize yourself with the Customizer dashboard. Experiment with different settings and options to get a feel for how the Customizer works. This will help you to better understand how to edit your sidebar and make other changes to your website’s design and layout.
Now that you’ve accessed the Customizer and understand the basics of how it works, you’re ready to start editing your sidebar. In the next section, we’ll take a closer look at how to locate the sidebar section within the Customizer and start making changes to your sidebar.
Locating the Sidebar Section: A Closer Look
Now that you’ve accessed the WordPress Customizer, it’s time to locate the sidebar section. The sidebar section is where you’ll find all the options and settings for customizing your sidebar. To locate the sidebar section, click on the “Widgets” tab in the Customizer dashboard.
Once you’re in the Widgets tab, you’ll see a list of available widgets and sidebar areas. The sidebar areas are designated by a series of rectangles with labels such as “Primary Sidebar” or “Secondary Sidebar”. These labels indicate the different areas of your website where you can place widgets.
Take a closer look at the available widgets and sidebar areas. You’ll notice that each widget has a brief description and a series of options for customizing its appearance and behavior. You’ll also see that each sidebar area has a series of widgets already assigned to it. These widgets are the default widgets that come with your WordPress theme.
To edit a sidebar, simply click on the sidebar area you want to edit. This will open up a new panel with options for adding, removing, and configuring widgets. You can also use the “Add a Widget” button to add new widgets to your sidebar.
As you explore the sidebar section, keep in mind that the options and settings available will vary depending on your WordPress theme and the widgets you have installed. Don’t be afraid to experiment and try out different widgets and settings to see what works best for your website.
Now that you’ve located the sidebar section and understand the basics of how it works, you’re ready to start adding and removing widgets from your sidebar. In the next section, we’ll take a closer look at how to add and remove widgets, including how to select and configure widgets, and how to reorder and delete them.
Adding and Removing Widgets: A Step-by-Step Guide
Now that you’ve located the sidebar section and understand the different sidebar areas and widgets available, it’s time to start adding and removing widgets from your sidebar. Adding widgets is a straightforward process that can be completed in just a few steps.
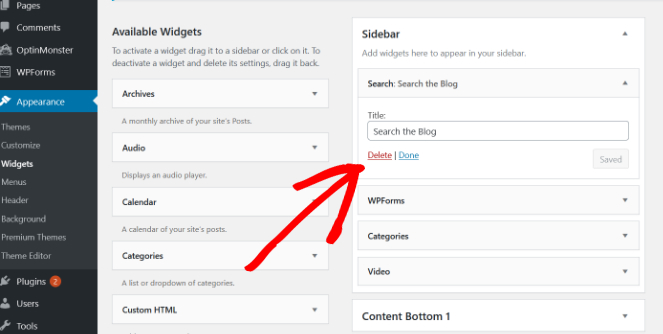
To add a widget, click on the “Add a Widget” button in the sidebar area where you want to add the widget. This will open up a list of available widgets, including text widgets, image widgets, and social media widgets. Browse through the list and select the widget you want to add.
Once you’ve selected the widget, click on the “Add Widget” button to add it to your sidebar. You can then configure the widget by clicking on the “Configure” button. This will open up a new panel with options for customizing the widget’s appearance and behavior.
Removing widgets is just as easy. To remove a widget, click on the “Remove” button next to the widget in the sidebar area. This will remove the widget from your sidebar and delete any associated settings.
In addition to adding and removing widgets, you can also reorder and delete widgets in your sidebar. To reorder widgets, simply drag and drop them into the desired position. To delete a widget, click on the “Delete” button next to the widget in the sidebar area.
When adding and removing widgets, keep in mind that the options and settings available will vary depending on the widget and your WordPress theme. Don’t be afraid to experiment and try out different widgets and settings to see what works best for your website.
By following these steps, you can easily add and remove widgets from your sidebar and customize their appearance and behavior. In the next section, we’ll take a closer look at how to customize sidebar widgets, including how to add images, text, and other media, and how to use widget-specific options to enhance their appearance and functionality.
Customizing Sidebar Widgets: Tips and Tricks
Now that you’ve added and removed widgets from your sidebar, it’s time to customize them to enhance their appearance and functionality. Customizing sidebar widgets can be a bit tricky, but with the right tips and tricks, you can create a sidebar that is both visually appealing and functional.
One of the easiest ways to customize sidebar widgets is to add images. Images can help to break up the text and make your sidebar more visually appealing. To add an image to a widget, simply click on the “Add Image” button and select the image you want to use.
In addition to adding images, you can also customize the text and other media in your sidebar widgets. For example, you can change the font size and color, add bold or italic text, and even add videos or audio files. To customize the text and other media in a widget, simply click on the “Configure” button and select the options you want to use.
Another way to customize sidebar widgets is to use widget-specific options. Each widget has its own set of options that can be used to customize its appearance and behavior. For example, the “Text” widget has options for changing the font size and color, while the “Image” widget has options for adding a caption and linking to a URL.
To use widget-specific options, simply click on the “Configure” button and select the options you want to use. You can also use the “Advanced” tab to access more advanced options, such as custom CSS and JavaScript.
By customizing your sidebar widgets, you can create a sidebar that is both visually appealing and functional. Remember to experiment with different options and settings to find the look and feel that works best for your website.
In the next section, we’ll discuss the role of sidebar plugins in WordPress, including how to find and install plugins, and how to use them to add new features and functionality to your sidebar.
Using Sidebar Plugins: Expanding Your Options
Sidebar plugins can be a powerful tool for expanding the functionality of your WordPress sidebar. With thousands of plugins available, you can find one that meets your specific needs and enhances your website’s user experience.
To find a sidebar plugin, navigate to the WordPress Plugin Directory and search for “sidebar plugin.” You can also use the “Plugin” tab in the WordPress dashboard to search for and install plugins.
Once you’ve found a plugin you like, click on the “Install Now” button to install it. After installation, click on the “Activate” button to activate the plugin.
After activating the plugin, you can configure its settings by clicking on the “Settings” link in the plugin’s description. This will take you to a page where you can customize the plugin’s options and settings.
Some popular sidebar plugins include the “Sidebar Widget” plugin, which allows you to add custom widgets to your sidebar, and the “Sidebar Menu” plugin, which allows you to create a custom menu for your sidebar.
When using sidebar plugins, keep in mind that they can sometimes conflict with other plugins or themes. If you experience any issues, try deactivating the plugin and then reactivating it to see if the issue resolves.
By using sidebar plugins, you can add new features and functionality to your WordPress sidebar, enhancing the user experience and improving website engagement.
In the next section, we’ll discuss common mistakes people make when editing their WordPress sidebar, including how to troubleshoot issues with widget alignment, spacing, and visibility.
Common Sidebar Editing Mistakes: Troubleshooting Tips
When editing your WordPress sidebar, it’s easy to make mistakes that can affect the appearance and functionality of your website. In this section, we’ll identify common mistakes people make when editing their WordPress sidebar and provide troubleshooting tips to help you resolve these issues.
One common mistake is incorrect widget alignment. If your widgets are not aligned properly, it can make your sidebar look cluttered and unprofessional. To fix this issue, check the widget settings and make sure that the alignment is set to “left” or “center”. You can also use the “Widget Alignment” plugin to help you align your widgets.
Another common mistake is incorrect spacing between widgets. If the spacing between your widgets is too small or too large, it can affect the overall appearance of your sidebar. To fix this issue, check the widget settings and adjust the spacing as needed. You can also use the “Widget Spacing” plugin to help you adjust the spacing between your widgets.
Visibility issues are also common when editing your WordPress sidebar. If your widgets are not visible, it can be frustrating and affect the user experience of your website. To fix this issue, check the widget settings and make sure that the visibility is set to “visible”. You can also use the “Widget Visibility” plugin to help you control the visibility of your widgets.
By identifying and troubleshooting common mistakes, you can ensure that your WordPress sidebar is functioning properly and providing a good user experience for your visitors.
In the next section, we’ll discuss best practices for designing an effective sidebar, including how to balance content and whitespace, how to use color and typography, and how to ensure mobile responsiveness.
Best Practices for Sidebar Design: Enhancing User Experience
When it comes to designing an effective sidebar in WordPress, there are several best practices to keep in mind. A well-designed sidebar can enhance user experience, improve website engagement, and increase conversions. Here are some tips to help you create a sidebar that works for your website.
First and foremost, it’s essential to balance content and whitespace in your sidebar. A cluttered sidebar can be overwhelming and distract from the main content of your website. To avoid this, use a limited number of widgets and ensure that there is sufficient whitespace between each one. This will create a clean and visually appealing design that is easy to navigate.
Color and typography also play a crucial role in sidebar design. Choose colors that complement your website’s brand and use typography that is clear and easy to read. Avoid using too many different fonts or font sizes, as this can create a confusing and disjointed look. Instead, stick to a consistent typography scheme throughout your sidebar.
Another critical aspect of sidebar design is mobile responsiveness. With more and more users accessing websites on their mobile devices, it’s essential to ensure that your sidebar is optimized for smaller screens. Use a responsive design that adapts to different screen sizes, and test your sidebar on various devices to ensure that it looks and functions as intended.
In addition to these design considerations, it’s also important to think about the functionality of your sidebar. Use widgets that provide value to your users, such as a search bar, recent posts, or social media links. Avoid using widgets that are unnecessary or redundant, as these can clutter your sidebar and detract from the user experience.
Finally, when learning how to edit a sidebar in WordPress, it’s essential to test and iterate on your design. Use analytics tools to track user behavior and identify areas for improvement. Make adjustments to your sidebar design based on this data, and continually test and refine your design to ensure that it is meeting your goals.
By following these best practices, you can create a sidebar that enhances user experience, improves website engagement, and increases conversions. Remember to balance content and whitespace, use color and typography effectively, ensure mobile responsiveness, and focus on functionality. With a well-designed sidebar, you can take your WordPress website to the next level and achieve your online goals.


