Understanding the Reasons for Deleting a WordPress Site
Deleting a WordPress site is a significant decision that should not be taken lightly. There are various reasons why users may want to delete a WordPress site, including abandoning a project, switching to a different platform, or resolving a technical issue. Perhaps the site is no longer needed, or it has become outdated and is no longer serving its purpose. Whatever the reason, it’s essential to understand the implications of deleting a WordPress site and to take the necessary steps to ensure a smooth process.
Before deleting a WordPress site, it’s crucial to consider the potential consequences. For instance, deleting a site will result in the loss of all data, including posts, pages, comments, and user information. Additionally, any customizations, plugins, and themes will also be deleted. Therefore, it’s vital to backup the site’s data before deletion to prevent any potential losses.
Furthermore, deleting a WordPress site may also impact search engine rankings and visibility. If the site has been indexed by search engines, deleting it may result in a loss of rankings and traffic. However, this can be mitigated by taking the necessary steps to update DNS settings and cancel domain registrations after deletion.
In some cases, users may want to delete a WordPress site due to technical issues or security concerns. For example, if the site has been hacked or infected with malware, deleting it may be the best option to prevent further damage. However, it’s essential to take the necessary steps to secure the site and prevent future attacks before deletion.
Overall, deleting a WordPress site is a significant decision that requires careful consideration. By understanding the reasons for deletion and taking the necessary steps to backup data and mitigate potential consequences, users can ensure a smooth process and minimize any potential losses.
Backup Your Data: Preparing for Site Deletion
Before deleting a WordPress site, it’s essential to backup the site’s data to prevent any potential losses. This includes plugins, themes, and content, which can be difficult to recover once the site is deleted. Backing up the site’s data ensures that you can restore the site to its previous state if needed.
WordPress provides a built-in tool for exporting site data, which can be accessed through the WordPress dashboard. To export the site’s data, navigate to the Tools > Export page and select the type of data you want to export. You can choose to export all content, including posts, pages, and comments, or select specific types of data.
In addition to the built-in export tool, there are also several third-party plugins available that can help you backup your WordPress site. Some popular options include UpdraftPlus, VaultPress, and Duplicator. These plugins offer a range of features, including automated backups, file and database backups, and the ability to restore your site from a backup.
When choosing a backup plugin, consider the following factors:
- Automated backups: Look for a plugin that offers automated backups, so you can set it and forget it.
- File and database backups: Ensure the plugin backs up both your site’s files and database.
- Restore options: Choose a plugin that offers easy restore options, in case you need to restore your site from a backup.
- Security: Consider a plugin that offers encryption and secure storage options for your backups.
By backing up your WordPress site’s data, you can ensure that you’re prepared for the deletion process and can minimize any potential losses. Remember to always backup your site’s data before deleting it, and consider using a third-party plugin to make the process easier and more secure.
Deleting a WordPress Site: Methods and Considerations
When it comes to deleting a WordPress site, there are several methods to consider. Each method has its pros and cons, and the best approach will depend on your specific situation. In this section, we’ll outline the different methods for deleting a WordPress site, including using the WordPress dashboard, FTP clients, or hosting provider tools.
**Method 1: Deleting a WordPress Site using the WordPress Dashboard**
This method is the most straightforward way to delete a WordPress site. To delete a site using the WordPress dashboard, navigate to the site settings page and click on the “Delete Site” button. This will permanently delete the site and all its associated data.
**Method 2: Deleting a WordPress Site using FTP or SFTP**
This method involves using an FTP or SFTP client to connect to your site’s files and delete them manually. This approach can be useful if you need to delete a site that is no longer accessible through the WordPress dashboard.
**Method 3: Deleting a WordPress Site through Your Hosting Provider**
This method involves using your hosting provider’s control panel to delete the site. This approach can be useful if you need to delete a site that is hosted on a shared server or if you need to delete multiple sites at once.
**Considerations Before Deleting a WordPress Site**
Before deleting a WordPress site, it’s essential to consider the potential consequences. Deleting a site will result in the loss of all data, including posts, pages, comments, and user information. Additionally, any customizations, plugins, and themes will also be deleted.
It’s also important to consider the potential impact on search engine rankings and visibility. Deleting a site can result in a loss of rankings and traffic, so it’s essential to take steps to mitigate this impact.
In the next section, we’ll provide a step-by-step guide on how to delete a WordPress site using the WordPress dashboard. We’ll also cover the implications of deleting a site and provide tips on how to minimize any potential losses.
Using the WordPress Dashboard to Delete a Site
Deleting a WordPress site using the dashboard is a straightforward process that can be completed in a few steps. Here’s a step-by-step guide on how to delete a WordPress site using the dashboard:
**Step 1: Navigate to the Site Settings Page**
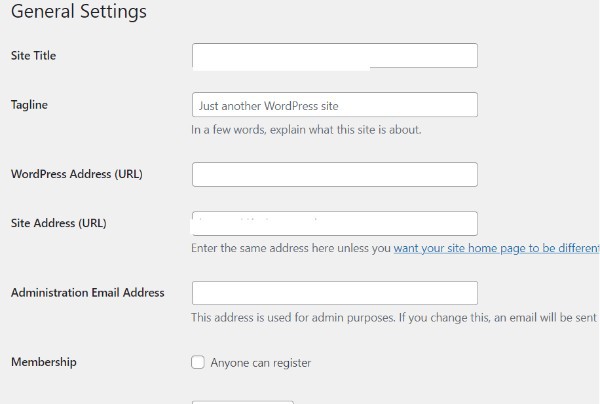
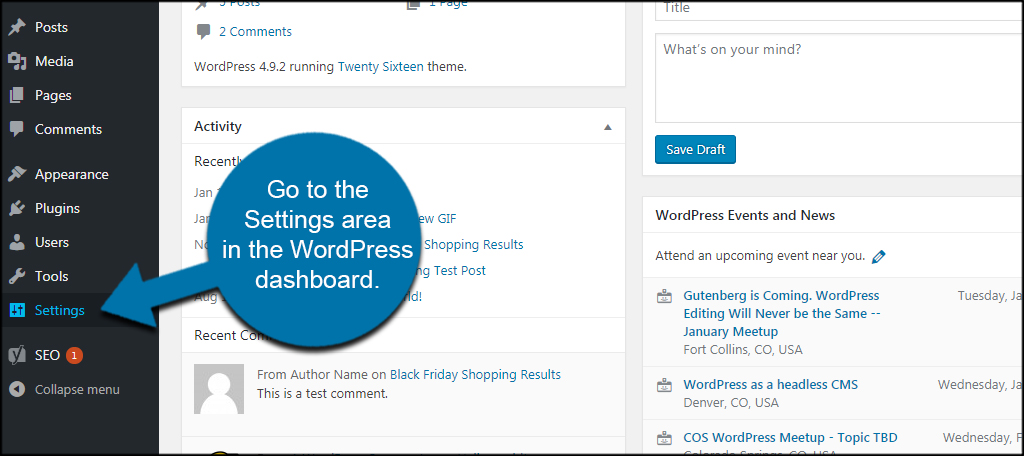
To delete a WordPress site using the dashboard, you’ll need to navigate to the site settings page. To do this, log in to your WordPress dashboard and click on the “Settings” icon in the left-hand menu.
**Step 2: Click on the “Delete Site” Button**
Once you’re on the site settings page, click on the “Delete Site” button. This button is usually located at the bottom of the page.
**Step 3: Confirm Deletion**
When you click on the “Delete Site” button, you’ll be prompted to confirm that you want to delete the site. This is a permanent action, so make sure you’re certain you want to delete the site before confirming.
**Step 4: Understand the Implications**
Before deleting a WordPress site, it’s essential to understand the implications. Deleting a site will result in the loss of all data, including posts, pages, comments, and user information. Additionally, any customizations, plugins, and themes will also be deleted.
**Tips and Precautions**
Before deleting a WordPress site, make sure you’ve backed up all your data and files. You should also consider the potential impact on search engine rankings and visibility. Deleting a site can result in a loss of rankings and traffic, so it’s essential to take steps to mitigate this impact.
By following these steps, you can delete a WordPress site using the dashboard. Remember to always backup your data and files before deleting a site, and consider the potential implications before taking action.
Deleting a WordPress Site via FTP or SFTP
Deleting a WordPress site via FTP or SFTP is a more technical approach that requires some knowledge of file management and FTP clients. This method is useful if you need to delete a site that is no longer accessible through the WordPress dashboard or if you need to delete multiple sites at once.
**Step 1: Connect to the Site via FTP or SFTP**
To delete a WordPress site via FTP or SFTP, you’ll need to connect to the site using an FTP or SFTP client. You can use a client like FileZilla or Cyberduck to connect to the site.
**Step 2: Locate the WordPress Files**
Once you’re connected to the site, you’ll need to locate the WordPress files. These files are usually located in the public_html or www directory.
**Step 3: Delete the WordPress Files**
To delete the WordPress files, simply select the files and folders that you want to delete and click on the “Delete” button. Make sure to delete all the files and folders, including the WordPress core files, plugins, and themes.
**Step 4: Delete the Database**
In addition to deleting the WordPress files, you’ll also need to delete the database. You can do this by connecting to the database using a tool like phpMyAdmin and deleting the database tables.
**Tips and Precautions**
When deleting a WordPress site via FTP or SFTP, make sure to be careful and delete only the files and folders that you intend to delete. Deleting the wrong files or folders can cause errors and data loss.
Additionally, make sure to backup your data and files before deleting a site, and consider the potential impact on search engine rankings and visibility. Deleting a site can result in a loss of rankings and traffic, so it’s essential to take steps to mitigate this impact.
By following these steps, you can delete a WordPress site via FTP or SFTP. Remember to always backup your data and files before deleting a site, and consider the potential implications before taking action.
Deleting a WordPress Site through Your Hosting Provider
Deleting a WordPress site through your hosting provider’s control panel is a straightforward process that can be completed in a few steps. This method is useful if you need to delete a site that is no longer accessible through the WordPress dashboard or if you need to delete multiple sites at once.
**Step 1: Locate the Site Management Tools**
To delete a WordPress site through your hosting provider’s control panel, you’ll need to locate the site management tools. These tools are usually located in the control panel’s dashboard or main menu.
**Step 2: Select the Site**
Once you’ve located the site management tools, you’ll need to select the site you want to delete. This will usually involve clicking on the site’s name or domain name.
**Step 3: Confirm Deletion**
After selecting the site, you’ll need to confirm that you want to delete it. This will usually involve clicking on a “Delete” or “Remove” button.
**Step 4: Understand the Implications**
Before deleting a WordPress site through your hosting provider’s control panel, it’s essential to understand the implications. Deleting a site will result in the loss of all data, including posts, pages, comments, and user information. Additionally, any customizations, plugins, and themes will also be deleted.
**Tips and Precautions**
When deleting a WordPress site through your hosting provider’s control panel, make sure to be careful and delete only the files and folders that you intend to delete. Deleting the wrong files or folders can cause errors and data loss.
Additionally, make sure to backup your data and files before deleting a site, and consider the potential impact on search engine rankings and visibility. Deleting a site can result in a loss of rankings and traffic, so it’s essential to take steps to mitigate this impact.
By following these steps, you can delete a WordPress site through your hosting provider’s control panel. Remember to always backup your data and files before deleting a site, and consider the potential implications before taking action.
Post-Deletion Steps: What to Do After Deleting a WordPress Site
After deleting a WordPress site, there are several steps you should take to ensure that the site is completely removed and that any remaining files or databases are deleted. In this section, we’ll outline the post-deletion steps you should take after deleting a WordPress site.
**Step 1: Update DNS Settings**
After deleting a WordPress site, you’ll need to update your DNS settings to point to a new site or to remove the old site’s DNS records. This will ensure that visitors to your site are directed to the correct location.
**Step 2: Cancel Domain Registrations**
If you registered a domain name for your WordPress site, you’ll need to cancel the registration after deleting the site. This will prevent any further charges for the domain name and will also prevent anyone from accessing the site.
**Step 3: Remove Remaining Files or Databases**
After deleting a WordPress site, there may be remaining files or databases that need to be removed. This can include files such as images, plugins, and themes, as well as databases that were used by the site.
**Step 4: Check for Any Remaining Links or References**
After deleting a WordPress site, you should check for any remaining links or references to the site. This can include links from other sites, social media profiles, or other online platforms.
**Tips and Precautions**
When taking post-deletion steps after deleting a WordPress site, make sure to be careful and thorough. Removing all remaining files and databases will ensure that the site is completely deleted and that there are no remaining links or references to the site.
Additionally, make sure to update your DNS settings and cancel any domain registrations to prevent any further charges or access to the site.
By following these post-deletion steps, you can ensure that your WordPress site is completely deleted and that any remaining files or databases are removed.
Common Issues and Troubleshooting: Deleting a WordPress Site
When deleting a WordPress site, you may encounter some common issues or errors. In this section, we’ll address some of the most common issues that may arise and provide troubleshooting tips and solutions.
**Error 1: Incomplete Deletion**
If you’re using the WordPress dashboard to delete a site, you may encounter an error that prevents the site from being completely deleted. This can be due to a number of reasons, including corrupted files or database issues.
**Solution:** Try using an FTP or SFTP client to delete the site files and database manually. This will ensure that all files and databases are completely removed.
**Error 2: Data Loss**
If you’re not careful, you may lose important data when deleting a WordPress site. This can include posts, pages, comments, and user information.
**Solution:** Make sure to backup your site data before deleting the site. You can use built-in WordPress tools or third-party plugins to backup your site data.
**Error 3: Broken Links**
If you have links to your WordPress site from other sites or social media profiles, you may encounter broken links after deleting the site.
**Solution:** Update your DNS settings and cancel any domain registrations to prevent any further charges or access to the site. You can also use a plugin like Broken Link Checker to find and fix broken links.
**Error 4: Database Errors**
If you’re using a database to store your WordPress site data, you may encounter database errors when deleting the site.
**Solution:** Try using a database management tool like phpMyAdmin to manually delete the database tables. You can also use a plugin like WP-DB Manager to manage your database and fix errors.
By following these troubleshooting tips and solutions, you can resolve common issues that may arise when deleting a WordPress site.


