Understanding the Role of Sidebars in WordPress
Sidebars play a crucial role in WordPress, serving as a complementary element to the main content area. They provide a space to display additional information, promote content, and enhance the overall user experience. By understanding the purpose and functionality of sidebars, users can effectively utilize this feature to improve their website’s design and usability.
One of the primary functions of a sidebar is to provide supplementary information that supports the main content. This can include widgets such as recent posts, categories, and tags, which help users navigate the site and discover new content. Sidebars can also be used to promote specific content, such as featured posts or products, to draw attention to important information.
In addition to providing information and promoting content, sidebars can also enhance the user experience by offering interactive elements. For example, a sidebar can include a search bar, allowing users to quickly find specific content on the site. Similarly, a sidebar can feature social media links, enabling users to share content and connect with the site’s social media presence.
When it comes to editing a sidebar in WordPress, it’s essential to consider the overall design and layout of the site. Users should aim to create a balance between the main content area and the sidebar, ensuring that the sidebar complements the content without overwhelming it. By understanding the role of sidebars in WordPress and effectively utilizing this feature, users can create a more engaging and user-friendly website.
Learning how to edit a sidebar in WordPress is a valuable skill for any website owner or administrator. By mastering this feature, users can enhance their site’s design, improve user experience, and increase engagement. Whether you’re looking to add widgets, remove unnecessary elements, or customize the appearance of your sidebar, understanding the basics of sidebar editing is essential.
Accessing the WordPress Customizer: A Beginner’s Guide
The WordPress Customizer is a powerful tool that allows users to customize various aspects of their website, including the sidebar. To access the Customizer, users can follow these steps:
First, log in to the WordPress dashboard and navigate to the Appearance section. From there, click on the Customize option, which will launch the Customizer interface. Alternatively, users can access the Customizer by clicking on the Customize button in the WordPress toolbar.
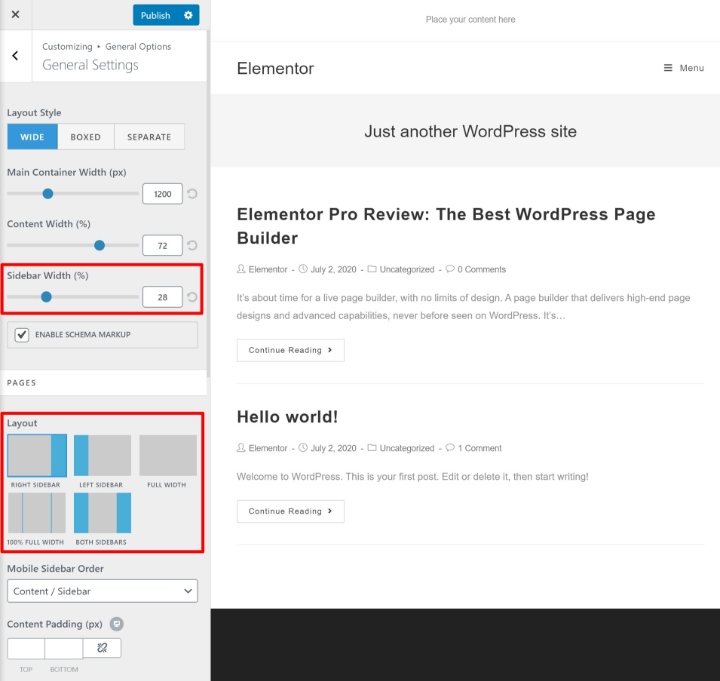
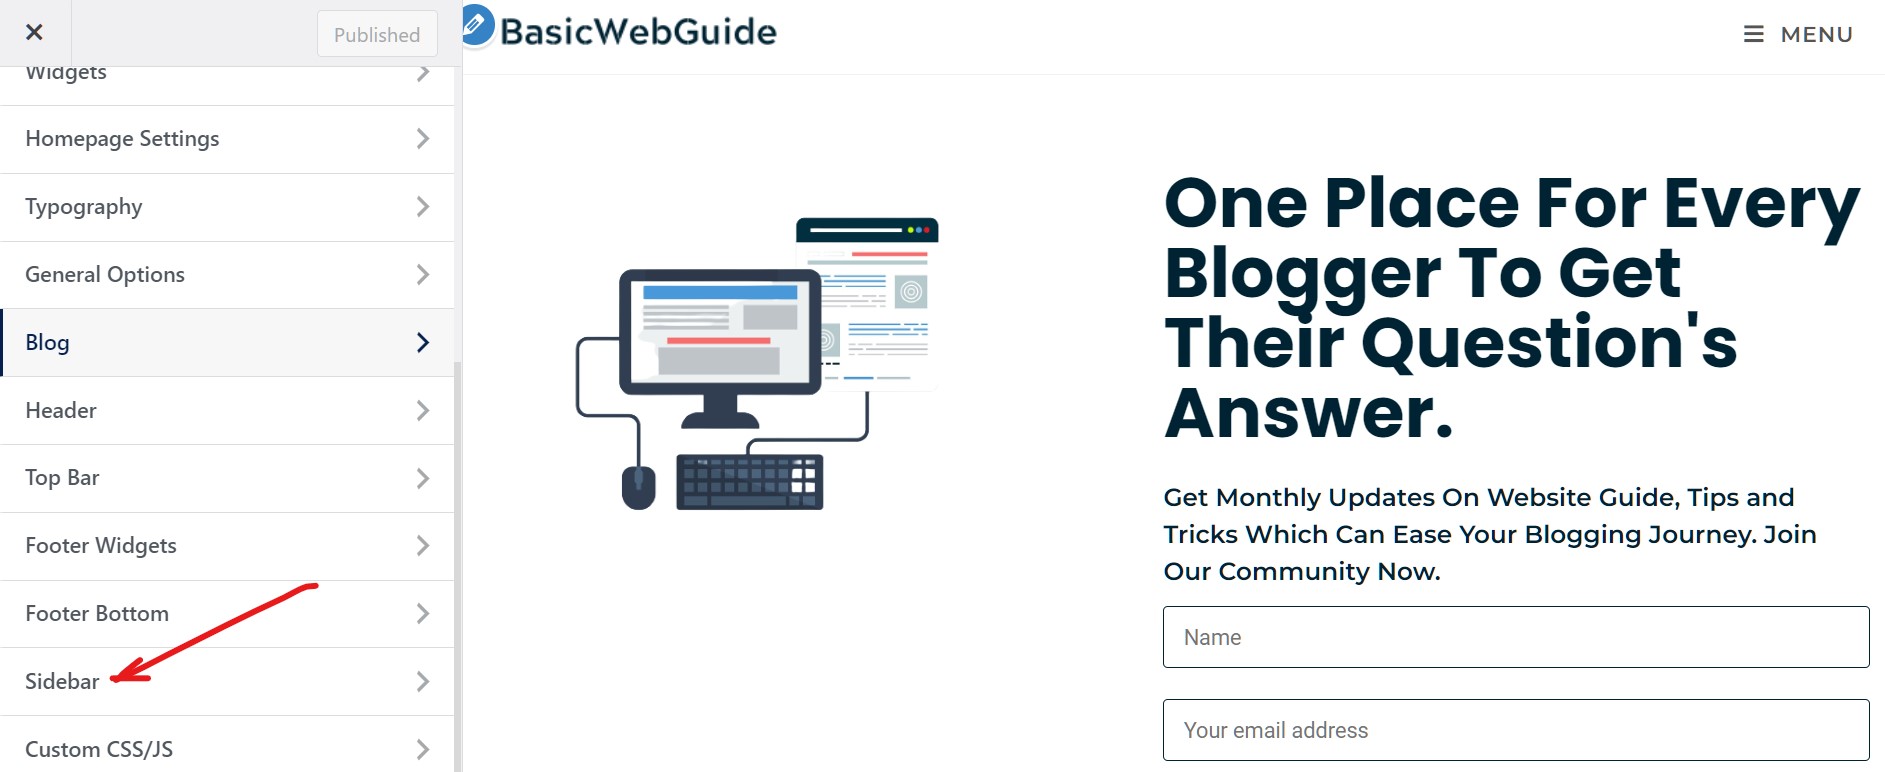
Once inside the Customizer, users will see a range of options and panels that allow them to customize different aspects of their website. The Customizer is divided into several sections, including Site Identity, Colors, and Layout. To edit the sidebar, users will need to navigate to the Widgets section.
The Customizer interface is user-friendly and intuitive, making it easy for beginners to navigate and make changes to their website. The live preview feature allows users to see the changes they make in real-time, without affecting the live site. This makes it easy to experiment with different layouts and designs without risking any downtime or errors.
When learning how to edit a sidebar in WordPress, it’s essential to understand how to access and use the Customizer. By mastering this tool, users can unlock a range of customization options and take their website to the next level. Whether you’re looking to add widgets, change the layout, or customize the appearance of your sidebar, the Customizer is the perfect place to start.
In the next section, we’ll take a closer look at how to locate the sidebar section in the Customizer and start making changes to your website’s sidebar.
Locating the Sidebar Section: A Tour of the Customizer
Now that you have accessed the WordPress Customizer, it’s time to locate the sidebar section. The Customizer is divided into several panels and menus, and the sidebar section can be found in the Widgets panel.
To find the Widgets panel, navigate to the left-hand menu in the Customizer and click on the Widgets option. This will open up the Widgets panel, which displays a list of available widgets and the sidebar areas where they can be placed.
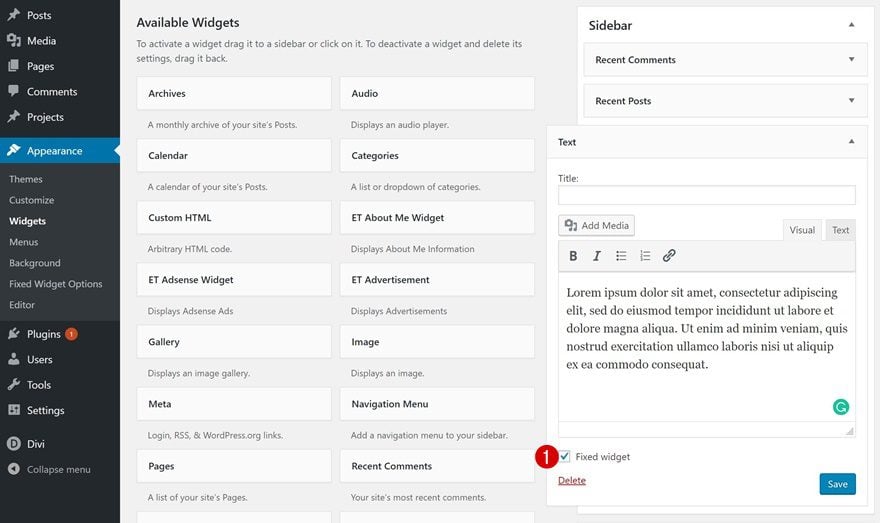
The Widgets panel is divided into two main sections: Available Widgets and Widget Areas. The Available Widgets section displays a list of all the widgets that are available for use on your website, including text widgets, image widgets, and social media widgets.
The Widget Areas section displays a list of all the sidebar areas on your website, including the primary sidebar, secondary sidebar, and footer sidebar. To add a widget to a sidebar area, simply drag and drop the widget from the Available Widgets section into the desired sidebar area.
Once you have added a widget to a sidebar area, you can configure its settings by clicking on the widget and adjusting the options as needed. This may include adding text or images, selecting a layout, or configuring other settings specific to the widget.
By mastering the Widgets panel and understanding how to add and configure widgets, you can take control of your website’s sidebar and create a customized layout that meets your needs. In the next section, we’ll take a closer look at how to add widgets to your sidebar and configure their settings.
Adding Widgets to Your Sidebar: A Step-by-Step Guide
Now that you have located the sidebar section in the Customizer, it’s time to add some widgets to your sidebar. Widgets are small blocks of content that can be added to your sidebar to provide additional information, promote content, and enhance user experience.
To add a widget to your sidebar, follow these steps:
1. Click on the Add a Widget button in the sidebar section of the Customizer.
2. Select the type of widget you want to add from the list of available widgets.
3. Click on the Add Widget button to add the widget to your sidebar.
4. Configure the widget settings as needed. This may include adding text or images, selecting a layout, or configuring other settings specific to the widget.
5. Click on the Save & Publish button to save your changes and publish the widget to your sidebar.
Some popular widgets to add to your sidebar include:
* Recent Posts: Displays a list of your most recent blog posts.
* Categories: Displays a list of your blog categories.
* Tags: Displays a list of your blog tags.
* Social Media: Displays links to your social media profiles.
By adding widgets to your sidebar, you can provide additional information and functionality to your website, and enhance the user experience. In the next section, we’ll take a closer look at how to remove and reorder widgets in your sidebar.
Removing and Reordering Widgets: Tips and Tricks
Once you have added widgets to your sidebar, you may need to remove or reorder them to optimize the layout and user experience. Removing and reordering widgets is a straightforward process that can be done directly in the Customizer.
To remove a widget from your sidebar, follow these steps:
1. Click on the widget you want to remove in the sidebar section of the Customizer.
2. Click on the Remove button to remove the widget from your sidebar.
To reorder widgets in your sidebar, follow these steps:
1. Click on the widget you want to move in the sidebar section of the Customizer.
2. Drag and drop the widget to the desired location in your sidebar.
Some tips to keep in mind when removing and reordering widgets:
* Make sure to save your changes after removing or reordering widgets to ensure that the changes are published to your live site.
* Use the live preview feature in the Customizer to see how your changes will affect the layout and user experience of your site.
* Consider the mobile responsiveness of your site when removing or reordering widgets, as some widgets may not be optimized for mobile devices.
By removing and reordering widgets, you can optimize the layout and user experience of your site, and ensure that your sidebar is working effectively to promote your content and enhance user engagement. In the next section, we’ll take a closer look at how to customize the appearance of your sidebar using themes and plugins.
Customizing Sidebar Appearance: Using Themes and Plugins
Once you have added and arranged your widgets, you can customize the appearance of your sidebar using themes and plugins. WordPress offers a wide range of themes and plugins that can help you customize the look and feel of your sidebar.
To customize the appearance of your sidebar using a theme, follow these steps:
1. Go to the Appearance section of your WordPress dashboard.
2. Click on the Themes option.
3. Browse through the available themes and select one that suits your needs.
4. Click on the Install button to install the theme.
5. Click on the Activate button to activate the theme.
Some popular plugins for customizing sidebar appearance include:
* Widget CSS Classes: This plugin allows you to add custom CSS classes to your widgets, giving you more control over their appearance.
* Sidebar Widget Styler: This plugin allows you to customize the appearance of your widgets, including their background color, text color, and padding.
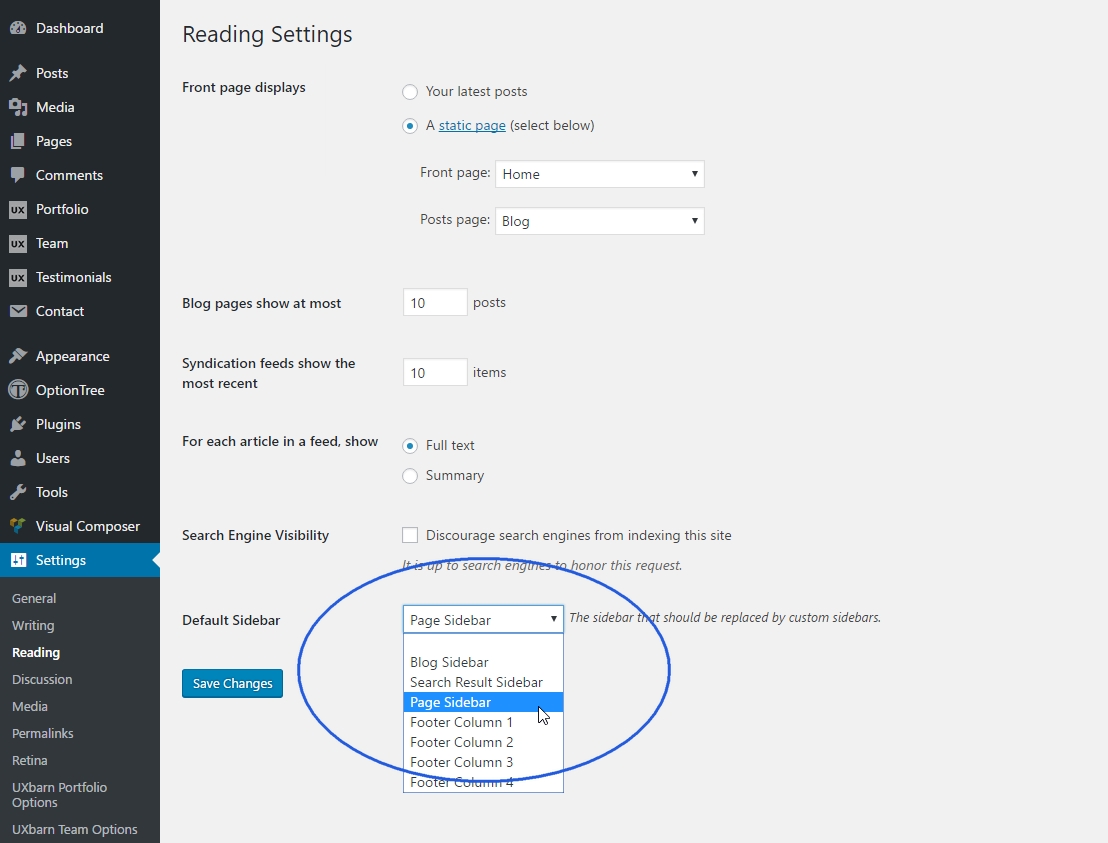
* Custom Sidebars: This plugin allows you to create custom sidebars and assign them to specific pages or posts.
By using themes and plugins, you can customize the appearance of your sidebar and make it more visually appealing to your visitors. In the next section, we’ll take a closer look at common sidebar editing mistakes and how to troubleshoot them.
Common Sidebar Editing Mistakes: Troubleshooting and Solutions
When editing your sidebar, it’s easy to make mistakes that can affect the appearance and functionality of your website. Here are some common sidebar editing mistakes and their solutions:
1. Broken Widgets: If a widget is not displaying correctly, try checking the widget’s settings and configuration. Make sure that the widget is enabled and that the settings are correct.
2. Layout Issues: If the layout of your sidebar is not displaying correctly, try checking the theme’s settings and configuration. Make sure that the theme is set to display the sidebar correctly and that the layout is not being overridden by a plugin or custom code.
3. Missing Widgets: If a widget is missing from your sidebar, try checking the widget’s settings and configuration. Make sure that the widget is enabled and that the settings are correct.
4. Incorrect Widget Order: If the widgets in your sidebar are not in the correct order, try checking the widget’s settings and configuration. Make sure that the widgets are in the correct order and that the settings are correct.
To troubleshoot common sidebar editing mistakes, try the following:
1. Check the theme’s documentation and support resources for troubleshooting guides and FAQs.
2. Check the plugin’s documentation and support resources for troubleshooting guides and FAQs.
3. Check the WordPress codex and support resources for troubleshooting guides and FAQs.
4. Try restoring the default settings for the theme and plugins to see if that resolves the issue.
By following these troubleshooting steps, you can quickly identify and resolve common sidebar editing mistakes and ensure that your website is displaying correctly.
Best Practices for Sidebar Editing: Expert Tips and Advice
When it comes to editing your sidebar, there are several best practices to keep in mind to ensure that your website is optimized for user experience and search engine ranking. Here are some expert tips and advice for sidebar editing:
1. Keep it simple: Avoid cluttering your sidebar with too many widgets or too much content. Keep your sidebar simple and focused on the most important information.
2. Use relevant widgets: Choose widgets that are relevant to your content and audience. Avoid using widgets that are not relevant or that do not add value to your website.
3. Optimize for mobile: Make sure that your sidebar is optimized for mobile devices. Use responsive design and ensure that your sidebar is easily accessible on smaller screens.
4. Use clear and concise language: Use clear and concise language in your sidebar to ensure that your message is communicated effectively.
5. Test and iterate: Test your sidebar regularly and make changes as needed. Use analytics to track user behavior and make data-driven decisions about your sidebar.
By following these best practices, you can create a sidebar that is optimized for user experience and search engine ranking. Remember to keep your sidebar simple, use relevant widgets, optimize for mobile, use clear and concise language, and test and iterate regularly.
Additionally, consider the following expert tips and advice for sidebar editing:
* Use a consistent design: Use a consistent design throughout your sidebar to create a cohesive look and feel.
* Use high-quality images: Use high-quality images in your sidebar to add visual interest and enhance user experience.
* Use calls-to-action: Use calls-to-action in your sidebar to encourage users to take action and engage with your content.
By incorporating these expert tips and advice into your sidebar editing strategy, you can create a sidebar that is optimized for user experience and search engine ranking.

