Understanding Image Resolution: The Basics
Image resolution is a fundamental concept in the world of digital imaging, and it plays a crucial role in determining the quality of an image. In simple terms, image resolution refers to the number of pixels that make up an image. Pixels are the tiny building blocks of an image, and the more pixels an image has, the higher its resolution. However, resolution is not just about the number of pixels; it’s also about the density of those pixels, which is measured in dots per inch (dpi) or pixels per inch (ppi).

Click Image to Find Market Products
When it comes to image resolution, there are several key factors to consider. The first is the difference between pixels, dpi, and ppi. While these terms are often used interchangeably, they actually refer to different aspects of image resolution. Pixels refer to the individual building blocks of an image, while dpi and ppi refer to the density of those pixels. For example, an image with a high pixel count but low dpi or ppi may not appear as sharp or clear as an image with a lower pixel count but higher dpi or ppi.
Understanding image resolution is essential for achieving professional-looking results, whether you’re working with digital images for web design, printing, or other applications. By grasping the basics of image resolution, you can ensure that your images look their best and effectively communicate your message. To find the perfect image resolution for your needs, it’s essential to consider the specific use case and the desired outcome. For instance, if you’re creating images for web use, you may want to opt for a lower resolution to reduce file size and improve loading times. On the other hand, if you’re printing images, you may want to use a higher resolution to achieve the best possible quality.
By mastering the basics of image resolution, you can unlock the secrets of image clarity and achieve stunning visuals that capture your audience’s attention. Whether you’re a seasoned designer or just starting out, understanding image resolution is a crucial skill that can help you take your work to the next level. So, how do you find the perfect image resolution for your needs? Let’s explore the answer to this question and more in the following sections.
https://www.youtube.com/watch?v=LOzKQRNjV34
How to Check Image Resolution: A Step-by-Step Guide
Checking the resolution of an image is a straightforward process that can be done using various software and tools. Here’s a step-by-step guide on how to check the resolution of an image using Adobe Photoshop, GIMP, and online image editors.
Using Adobe Photoshop:
1. Open the image in Adobe Photoshop.
2. Go to the “Image” menu and select “Image Size.”
3. In the “Image Size” dialog box, you’ll see the image’s resolution listed in pixels per inch (ppi).
4. You can also check the image’s resolution by going to the “File” menu and selecting “File Info.”
Using GIMP:
1. Open the image in GIMP.
2. Go to the “Image” menu and select “Scale Image.”
3. In the “Scale Image” dialog box, you’ll see the image’s resolution listed in pixels per inch (ppi).
4. You can also check the image’s resolution by going to the “File” menu and selecting “Properties.”
Using Online Image Editors:
1. Upload the image to an online image editor such as Canva or Pixlr.
2. Click on the “Image” or “File” menu and select “Properties” or “Image Info.”
3. In the properties or image info dialog box, you’ll see the image’s resolution listed in pixels per inch (ppi).
By following these steps, you can easily check the resolution of an image using various software and tools. This is an essential step in understanding how to find image resolution and ensuring that your images look their best.
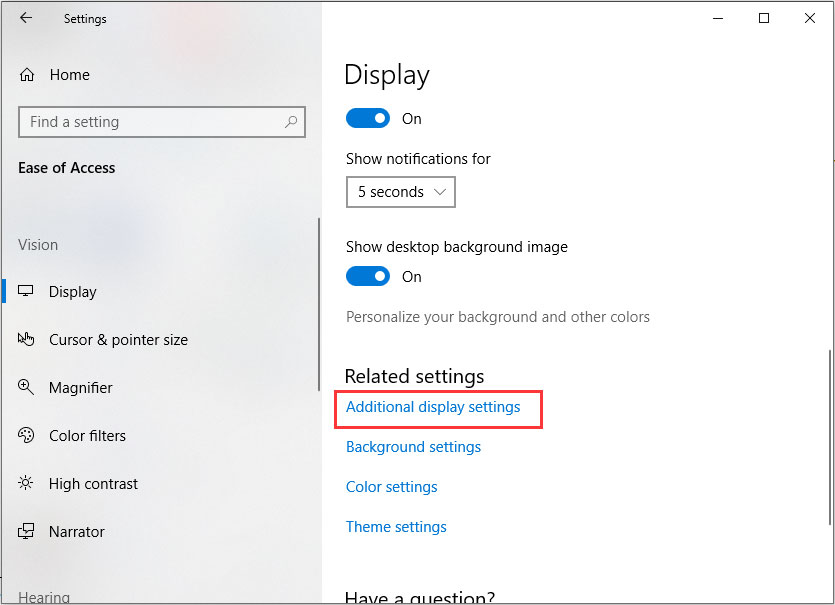
Image Resolution and File Size: What’s the Connection?
Image resolution and file size are closely related, and understanding the connection between the two is crucial for achieving optimal results. In general, a higher image resolution results in a larger file size, while a lower image resolution results in a smaller file size. However, this is not always the case, and there are several factors that can affect the relationship between image resolution and file size.
One of the main factors that affects the relationship between image resolution and file size is the compression algorithm used to compress the image. Different compression algorithms can result in different file sizes for the same image resolution. For example, JPEG compression is generally more efficient than PNG compression, resulting in smaller file sizes for the same image resolution.
Another factor that affects the relationship between image resolution and file size is the color depth of the image. Images with a higher color depth (such as 24-bit or 32-bit) require more data to store than images with a lower color depth (such as 8-bit or 16-bit). This means that images with a higher color depth will generally have larger file sizes than images with a lower color depth, even if they have the same resolution.
When it comes to web use, it’s generally best to aim for a balance between image resolution and file size. A high-resolution image may look great on a website, but if it’s too large, it can slow down the page loading time and negatively impact the user experience. On the other hand, a low-resolution image may be too small and pixelated, which can also negatively impact the user experience.
To achieve the best results, it’s often necessary to compress images for web use. This can be done using a variety of tools and software, including Adobe Photoshop and online image compressors. By compressing images, you can reduce the file size while maintaining the image resolution, resulting in faster page loading times and a better user experience.

Common Image Resolution Mistakes to Avoid
When working with image resolution, there are several common mistakes that can lead to poor results. One of the most common mistakes is upsampling or downsampling an image incorrectly. Upsampling involves increasing the resolution of an image, while downsampling involves decreasing the resolution. However, if not done correctly, these processes can result in a loss of image quality or a distorted image.
Another common mistake is not considering the intended use of the image when selecting a resolution. For example, an image intended for web use may not require the same high resolution as an image intended for printing. By selecting the wrong resolution, you may end up with an image that is too large or too small for its intended use.
Additionally, many people make the mistake of assuming that a higher resolution is always better. However, this is not always the case. A higher resolution can result in a larger file size, which can slow down page loading times and negatively impact the user experience. By balancing resolution with file size, you can achieve the best results for your images.
To avoid these mistakes, it’s essential to understand the basics of image resolution and how to work with it effectively. By following best practices and considering the intended use of the image, you can achieve professional-looking results and avoid common mistakes.
Some tips to avoid common image resolution mistakes include:
– Always consider the intended use of the image when selecting a resolution.
– Use the correct software and tools to upsample or downsample an image.
– Balance resolution with file size to achieve the best results.
– Test your images in different contexts to ensure they look their best.
By following these tips and avoiding common mistakes, you can master image resolution and achieve stunning visuals for your images.

Image Resolution for Specific Use Cases: Best Practices
When it comes to image resolution, different use cases require different resolutions. Understanding the ideal resolution for a specific use case can help you achieve the best results. Here are some best practices for image resolution in various use cases:
Printing Business Cards:
– Resolution: 300 dpi
– File size: 1-2 MB
– Image size: 3.5 x 2 inches (standard business card size)
Creating Social Media Graphics:
– Resolution: 72 dpi
– File size: 100-500 KB
– Image size: Varies depending on the social media platform (e.g. Facebook, Twitter, Instagram)
Designing Billboards:
– Resolution: 150 dpi
– File size: 5-10 MB
– Image size: Varies depending on the billboard size (e.g. 14 x 48 feet, 20 x 60 feet)
Web Design:
– Resolution: 72 dpi
– File size: 100-500 KB
– Image size: Varies depending on the website design and layout
By following these best practices, you can ensure that your images are optimized for their intended use case and look their best. Remember to always consider the file size and image size when selecting a resolution, as these factors can impact the overall quality of the image.

Tools and Software for Image Resolution: A Roundup
There are many tools and software available for working with image resolution, each with its own strengths and weaknesses. Here’s a roundup of some of the most popular options:
Adobe Creative Cloud:
– Pros: Industry-standard software, wide range of features and tools, seamless integration with other Adobe apps
– Cons: Can be expensive, steep learning curve for beginners
Skylum Luminar:
– Pros: User-friendly interface, powerful editing tools, affordable pricing
– Cons: Limited features compared to Adobe Creative Cloud, not ideal for advanced users
Online Image Editors:
– Pros: Free or low-cost, easy to use, accessible from anywhere
– Cons: Limited features, may not be suitable for advanced editing or high-resolution images
GIMP:
– Pros: Free and open-source, wide range of features and tools, compatible with many file formats
– Cons: Steep learning curve, not as user-friendly as some other options
When choosing a tool or software for working with image resolution, consider your specific needs and goals. If you’re a professional designer or photographer, Adobe Creative Cloud may be the best option. However, if you’re a beginner or on a budget, Skylum Luminar or online image editors may be a better choice.
Regardless of which tool or software you choose, understanding how to find image resolution and work with it effectively is crucial for achieving professional-looking results. By mastering image resolution, you can take your images to the next level and create stunning visuals that capture your audience’s attention.
Conclusion: Mastering Image Resolution for Stunning Visuals
Mastering image resolution is a crucial aspect of creating stunning visuals that capture your audience’s attention. By understanding the basics of image resolution, including the difference between pixels, dpi, and ppi, you can ensure that your images look their best in various contexts.
Whether you’re a professional designer or photographer, or just starting out, it’s essential to know how to find image resolution and work with it effectively. By following the tips and guidelines outlined in this article, you can avoid common mistakes and achieve professional-looking results.
Remember, image resolution is not just about the technical aspects of an image; it’s also about the overall aesthetic and effectiveness of the image. By balancing resolution with file size, compressing images for web use, and using the right tools and software, you can create images that are both visually stunning and functional.
Experiment and practice working with image resolution to develop your skills and achieve the best results. With time and practice, you’ll become proficient in finding the perfect image resolution for your needs and creating stunning visuals that capture your audience’s attention.
By mastering image resolution, you’ll be able to take your images to the next level and create visuals that are truly unforgettable. So, don’t be afraid to experiment and try new things – with practice and patience, you’ll become a master of image resolution and create stunning visuals that leave a lasting impression.

Conclusion: Mastering Image Resolution for Stunning Visuals
In conclusion, mastering image resolution is a crucial aspect of creating stunning visuals that capture your audience’s attention. By understanding the basics of image resolution, including the difference between pixels, dpi, and ppi, you can ensure that your images look their best in various contexts.
Throughout this article, we’ve discussed the importance of image resolution in various contexts, such as printing, digital displays, and web design. We’ve also provided a step-by-step guide on how to check the resolution of an image using various software and tools, and discussed the relationship between image resolution and file size.
In addition, we’ve identified common mistakes people make when working with image resolution, such as upsampling or downsampling incorrectly, and provided tips on how to avoid these mistakes and achieve the best results. We’ve also discussed the ideal image resolutions for specific use cases, such as printing business cards, creating social media graphics, or designing billboards.
Finally, we’ve reviewed and compared various tools and software for working with image resolution, including Adobe Creative Cloud, Skylum Luminar, and online image editors. By understanding the pros and cons of each option, you can choose the best tool for your needs and achieve professional-looking results.
By mastering image resolution, you’ll be able to take your images to the next level and create stunning visuals that capture your audience’s attention. Remember to experiment and practice working with image resolution to develop your skills and achieve the best results.
