Getting Started with YouTube Video Creation
Creating a YouTube video on a laptop requires some basic equipment and software. To get started, you’ll need a laptop with a decent processor, RAM, and storage. You’ll also need a webcam or external camera, a microphone, and a stable internet connection. In addition to the hardware, you’ll need video editing software, such as Adobe Premiere Pro, Final Cut Pro, or DaVinci Resolve, to edit and finalize your video.
Before diving into the technical aspects, it’s essential to have a clear idea of the content you want to create and who your target audience is. What is the main topic of your video? Who are you trying to reach with your message? Answering these questions will help you create a focused and engaging video that resonates with your audience.
When it comes to creating a YouTube video on a laptop, the possibilities are endless. You can create vlogs, tutorials, reviews, or even live streams. The key is to identify your niche and create content that is both informative and entertaining. By doing so, you’ll be able to attract and retain a large following, increasing your chances of success on the platform.
To make a YouTube video on a laptop, you’ll need to invest time and effort into planning, scripting, and recording your content. However, with the right equipment and software, you can create high-quality videos that showcase your creativity and expertise. Whether you’re a beginner or an experienced creator, the tips and techniques outlined in this article will help you get started on your YouTube journey.
Choosing the Right Video Editing Software for Your Laptop
When it comes to editing a YouTube video on a laptop, the right software can make all the difference. With so many options available, it can be overwhelming to choose the best one for your needs. In this section, we’ll explore some of the most popular video editing software options for laptops, including Adobe Premiere Pro, Final Cut Pro, and DaVinci Resolve.
Adobe Premiere Pro is a professional-level video editing software that is widely used in the industry. It offers advanced features such as multi-camera editing, color grading, and visual effects. Premiere Pro is available for both Windows and macOS, and offers a free trial, as well as a subscription-based model.
Final Cut Pro is a professional-level video editing software exclusive to macOS. It offers advanced features such as color grading, audio editing, and visual effects. Final Cut Pro is known for its user-friendly interface and is a popular choice among YouTubers and filmmakers.
DaVinci Resolve is a free video editing software that is available for both Windows and macOS. It offers advanced features such as color grading, audio editing, and visual effects. DaVinci Resolve is a popular choice among indie filmmakers and YouTubers, and is known for its high-quality output and user-friendly interface.
When choosing a video editing software for your laptop, consider the following factors: ease of use, features, and pricing. If you’re just starting out, you may want to consider a free or low-cost option like DaVinci Resolve or iMovie. If you’re looking for more advanced features, Adobe Premiere Pro or Final Cut Pro may be a better choice.
Regardless of which software you choose, make sure it is compatible with your laptop’s operating system and hardware. You’ll also want to consider the software’s system requirements, such as RAM and processor speed, to ensure smooth performance.
Setting Up Your Laptop for Video Recording
To start recording a YouTube video on your laptop, you’ll need to set up your equipment and ensure that your laptop is configured for optimal video recording. In this section, we’ll walk you through the steps to set up your laptop for video recording, including choosing a suitable webcam or external camera, selecting a microphone, and ensuring proper lighting.
First, you’ll need to choose a webcam or external camera that is compatible with your laptop. If you’re using a built-in webcam, make sure it’s clean and free of dust. If you’re using an external camera, connect it to your laptop via USB or HDMI. Popular external camera options include the Logitech C920 and the Razer Kiyo.
Next, you’ll need to select a microphone that can capture high-quality audio. If you’re using a built-in microphone, make sure it’s not picking up any background noise. If you’re using an external microphone, connect it to your laptop via USB or XLR. Popular external microphone options include the Blue Yeti and the Rode NT-USB.
Proper lighting is also essential for recording a high-quality YouTube video. Natural light is always the best option, so try to record near a window or outside. If you’re recording indoors, invest in a good quality lighting kit that includes a key light, fill light, and backlight.
Once you’ve set up your equipment, make sure your laptop is configured for optimal video recording. Check that your webcam and microphone are selected as the default devices in your laptop’s settings. Also, ensure that your laptop’s screen resolution is set to the highest possible setting to ensure that your video is recorded in high definition.
By following these steps, you’ll be able to set up your laptop for video recording and start creating high-quality YouTube videos. Remember to always test your equipment before recording to ensure that everything is working properly.
Planning and Scripting Your YouTube Video
Before you start recording your YouTube video, it’s essential to plan and script your content. This will help you create a clear and concise message that resonates with your target audience. In this section, we’ll discuss the importance of planning and scripting your YouTube video, including defining the content, creating an outline, and writing a script.
Defining the content of your YouTube video is the first step in the planning process. What is the main topic of your video? What message do you want to convey to your audience? What are the key points you want to cover? Answering these questions will help you create a clear and focused content strategy.
Once you’ve defined the content of your video, create an outline to organize your thoughts and ideas. An outline should include the introduction, main points, and conclusion of your video. This will help you stay on track and ensure that your video flows smoothly.
Writing a script is the next step in the planning process. A script should include the dialogue, narration, and any other audio elements that will be included in your video. Keep your script concise and engaging, and make sure it aligns with your content strategy.
When writing your script, consider the following tips:
- Keep it concise: Aim for a script that is 1-2 pages long, depending on the length of your video.
- Make it engaging: Use humor, anecdotes, and other storytelling techniques to keep your audience engaged.
- Use clear language: Avoid using jargon or technical terms that may confuse your audience.
- Use a conversational tone: Write your script in a friendly and approachable tone that resonates with your audience.
By planning and scripting your YouTube video, you’ll be able to create a clear and concise message that resonates with your target audience. Remember to keep your script concise, engaging, and easy to understand, and don’t be afraid to make changes as needed.
Recording Your YouTube Video on a Laptop
Now that you’ve planned and scripted your YouTube video, it’s time to start recording. In this section, we’ll provide a step-by-step guide on how to record a YouTube video on a laptop, including setting up the camera and microphone, choosing a recording software, and tips for a smooth recording process.
Step 1: Set up your camera and microphone. Make sure your webcam or external camera is properly connected to your laptop, and that your microphone is plugged in and working correctly.
Step 2: Choose a recording software. There are many recording software options available, including OBS Studio, XSplit, and Camtasia. Choose a software that is compatible with your laptop and meets your recording needs.
Step 3: Set up your recording software. Once you’ve chosen a recording software, set it up to record your video. This will typically involve selecting the camera and microphone you want to use, setting the resolution and frame rate, and choosing a recording format.
Step 4: Start recording. Once you’ve set up your recording software, start recording your video. Make sure to speak clearly and confidently, and to follow the script you’ve written.
Tips for a smooth recording process:
- Make sure your laptop is fully charged and plugged in to avoid any interruptions.
- Use a high-quality webcam or external camera to ensure clear video.
- Invest in a good quality microphone to ensure clear audio.
- Use a pop filter to reduce plosive sounds and improve audio quality.
- Record in a quiet room with minimal background noise.
By following these steps and tips, you’ll be able to record a high-quality YouTube video on your laptop. Remember to stay focused, speak clearly, and have fun!
Editing and Post-Production Techniques for Your YouTube Video
Once you’ve recorded your YouTube video, it’s time to edit and enhance it using post-production techniques. In this section, we’ll discuss the basics of video editing, including cutting, trimming, and arranging clips. We’ll also introduce advanced techniques such as color correction, audio ducking, and visual effects.
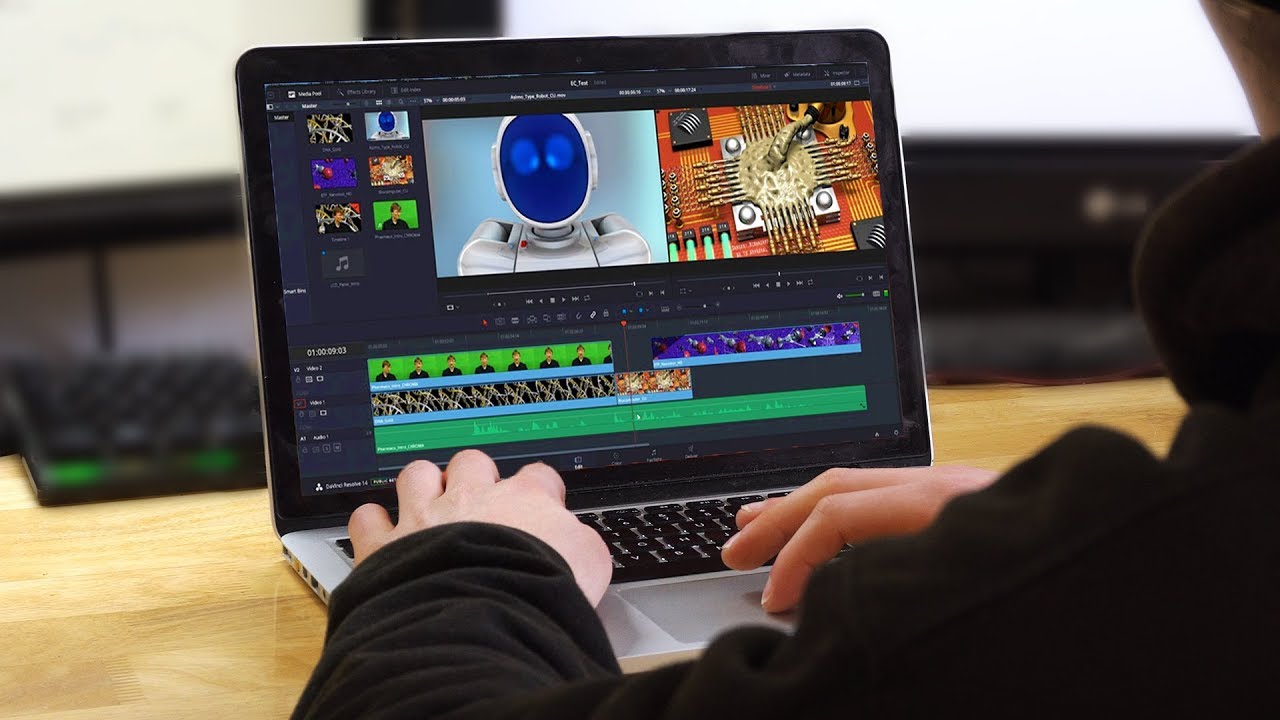
Video editing is the process of selecting and combining video clips to create a cohesive and engaging video. There are many video editing software options available, including Adobe Premiere Pro, Final Cut Pro, and DaVinci Resolve. Each software has its own unique features and interface, but they all share the same basic editing tools.
Basic editing techniques include:
- Cutting: removing unwanted parts of a clip
- Trimming: adjusting the length of a clip
- Arranging: placing clips in a specific order
Advanced editing techniques include:
- Color correction: adjusting the color and brightness of a clip
- Audio ducking: adjusting the volume of a clip to match the background noise
- Visual effects: adding special effects such as transitions, animations, and text overlays
When editing your YouTube video, keep the following tips in mind:
- Keep it simple: avoid over-editing, which can make your video look amateurish
- Use transitions: transitions can help to smooth out the flow of your video
- Add music: music can help to set the tone and mood of your video
By using these editing and post-production techniques, you can enhance your YouTube video and make it more engaging for your audience.
Adding Visuals and Graphics to Enhance Your YouTube Video
Adding visuals and graphics to your YouTube video can help to enhance its overall quality and make it more engaging for your audience. In this section, we’ll discuss the importance of adding visuals and graphics, including text overlays, transitions, and animations. We’ll also provide tips on how to create engaging thumbnails and end screens.
Text overlays are a great way to add context and information to your video. They can be used to highlight key points, provide additional information, or even to add a touch of humor. When creating text overlays, make sure to use a clear and easy-to-read font, and to keep the text concise and to the point.
Transitions are another way to add visual interest to your video. They can be used to move from one scene to another, or to add a touch of drama or excitement. When using transitions, make sure to use them sparingly and to choose transitions that are relevant to the content of your video.
Animations can be used to add a touch of creativity and flair to your video. They can be used to illustrate complex concepts, or to add a touch of humor. When creating animations, make sure to use a consistent style and to keep the animations simple and easy to understand.
Thumbnails are a crucial part of your YouTube video’s success. They are the first thing that viewers will see when they come across your video, and they can make or break your video’s chances of being viewed. When creating thumbnails, make sure to use a clear and eye-catching image, and to include text that accurately reflects the content of your video.
End screens are another way to add visual interest to your video. They can be used to provide additional information, or to promote other videos or channels. When creating end screens, make sure to use a clear and easy-to-read font, and to keep the text concise and to the point.
By adding visuals and graphics to your YouTube video, you can enhance its overall quality and make it more engaging for your audience. Remember to use text overlays, transitions, and animations sparingly, and to create thumbnails and end screens that accurately reflect the content of your video.
Uploading and Optimizing Your YouTube Video for Maximum Views
Once you’ve created and edited your YouTube video, it’s time to upload it to the platform and optimize it for maximum views. In this section, we’ll guide you through the process of uploading your video, including setting titles, descriptions, and tags. We’ll also provide tips on how to optimize your video for maximum views, including thumbnail optimization and promotion strategies.
Uploading your video to YouTube is a straightforward process. Simply log in to your YouTube account, click on the “Upload” button, and select the video file you want to upload. Make sure to choose the correct category and add relevant keywords to your video’s title, description, and tags.
Optimizing your video for maximum views is crucial to its success. Here are some tips to help you optimize your video:
- Use keywords in your title, description, and tags to help your video rank higher in search results.
- Create a eye-catching thumbnail that accurately represents your video and grabs the viewer’s attention.
- Promote your video on social media platforms, forums, and blogs to increase its visibility.
- Engage with your audience by responding to comments and creating a community around your video.
By following these tips, you can increase your video’s visibility, engagement, and views. Remember to always follow YouTube’s community guidelines and terms of service to avoid any penalties or account suspensions.
With these final tips, you’re now ready to create and upload your own YouTube video from your laptop. Remember to have fun, be creative, and always keep your audience in mind. Good luck!


