Why You Should Add Pictures to Google
Adding images to Google can significantly enhance your online presence and improve your search engine rankings. By including high-quality images in your Google listings, you can increase your visibility, drive more traffic to your website, and boost your brand’s credibility. When you learn how to put a picture on Google, you can take advantage of these benefits and more.

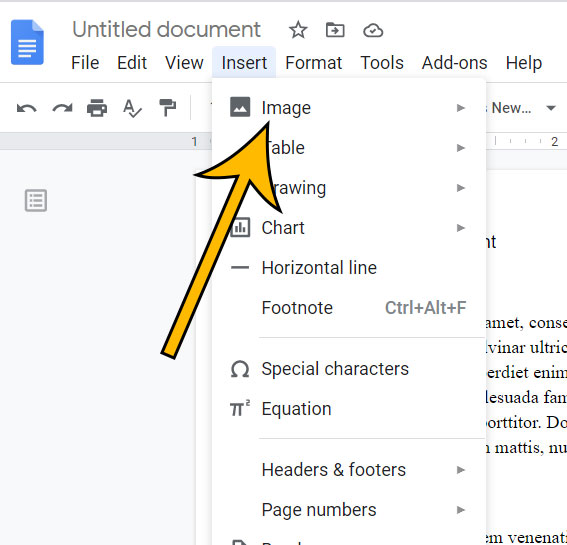
Click Image to Find Market Products
One of the primary advantages of adding images to Google is that it allows you to showcase your products, services, or brand in a more engaging and visual way. This can help potential customers to better understand your offerings and make informed decisions. Moreover, images can also help to break up text and make your content more scannable, improving the overall user experience.
When it comes to search engine rankings, images can play a crucial role. By optimizing your images with relevant keywords, alt tags, and descriptions, you can improve your chances of appearing in Google’s image search results. This can drive more traffic to your website and increase your online visibility. By understanding how to put a picture on Google, you can optimize your images for better search engine rankings.
In addition to these benefits, adding images to Google can also help to establish your brand’s identity and build trust with your target audience. By showcasing high-quality images that reflect your brand’s values and personality, you can create a positive impression and differentiate yourself from competitors. Whether you’re a business owner or an individual, learning how to put a picture on Google can help you achieve your online goals.
Understanding Google’s Image Policies
Before you learn how to put a picture on Google, it’s essential to understand the platform’s image policies. Google has specific guidelines for image uploads, including acceptable file formats, size limits, and content restrictions. By familiarizing yourself with these policies, you can ensure that your images are accepted and displayed correctly.
Google accepts a variety of image file formats, including JPEG, PNG, GIF, and BMP. However, it’s recommended to use JPEG or PNG formats for most images, as they offer the best balance between quality and file size. When it comes to image size, Google has specific limits for different types of images. For example, profile pictures should be at least 250 x 250 pixels, while cover photos should be at least 1080 x 608 pixels.
In addition to file format and size restrictions, Google also has content guidelines for images. Images should not contain explicit or copyrighted content, and should not be used to deceive or mislead users. Google also prohibits images that promote hate speech, violence, or harassment. By following these guidelines, you can ensure that your images are compliant with Google’s policies and are displayed correctly.
Google’s image policies also include guidelines for image captions and descriptions. Captions should be descriptive and accurate, and should not contain spam or misleading content. Descriptions should provide additional context for the image, and should not exceed 1000 characters. By following these guidelines, you can improve the visibility and accessibility of your images on Google.
By understanding Google’s image policies, you can ensure that your images are accepted and displayed correctly. This is an essential step in learning how to put a picture on Google, and can help you achieve your online goals. In the next section, we’ll discuss how to prepare your image for upload, including tips on resizing, compressing, and formatting images for web use.
Preparing Your Image for Upload
Before you learn how to put a picture on Google, it’s essential to prepare your image for upload. This involves optimizing your image for web use, which can help improve its visibility and search engine rankings. In this section, we’ll provide tips on how to resize, compress, and format your image for Google.
Resizing your image is crucial for web use. Google recommends using images that are at least 720 pixels wide, but no larger than 4000 pixels. You can use image editing software like Adobe Photoshop or Canva to resize your image. When resizing, make sure to maintain the aspect ratio to avoid distorting the image.
Compressing your image can help reduce its file size, making it easier to upload and faster to load on Google. You can use image compression tools like TinyPNG or ImageOptim to compress your image. Be careful not to over-compress, as this can affect the image quality.
Formatting your image for web use involves saving it in a suitable file format. Google recommends using JPEG or PNG formats for most images. JPEG is ideal for photographs, while PNG is better suited for graphics and illustrations. When saving your image, make sure to choose the correct file format and adjust the quality settings accordingly.
In addition to resizing, compressing, and formatting, you should also consider optimizing your image’s metadata. This includes adding descriptive file names, alt tags, and captions to your image. These metadata elements can help improve your image’s visibility and search engine rankings on Google.
By preparing your image for upload, you can ensure that it looks great on Google and is easily discoverable by users. In the next section, we’ll explain how to upload images to Google My Business, including how to access the platform, select the correct image type, and add captions and descriptions.
Uploading Images to Google My Business
Now that you’ve prepared your image for upload, it’s time to learn how to put a picture on Google My Business. Google My Business is a powerful platform that allows you to manage your business’s online presence, including adding images. In this section, we’ll explain the process of uploading images to Google My Business.
To upload images to Google My Business, you’ll need to access the platform. You can do this by signing in to your Google account and navigating to the Google My Business dashboard. From there, click on the “Photos” tab and select “Add photos” to begin the upload process.
When uploading images to Google My Business, you’ll need to select the correct image type. Google My Business allows you to upload different types of images, including profile pictures, cover photos, and interior photos. Make sure to select the correct image type to ensure that your image is displayed correctly.
In addition to selecting the correct image type, you’ll also need to add captions and descriptions to your images. Captions should be descriptive and accurate, and should not contain spam or misleading content. Descriptions should provide additional context for the image, and should not exceed 1000 characters.
When uploading images to Google My Business, you may encounter some common issues, such as image format errors or size limits. If you encounter any issues, you can refer to Google’s image upload guidelines for troubleshooting tips.
By uploading images to Google My Business, you can enhance your business’s online presence and improve your search engine rankings. In the next section, we’ll explain how to add images to Google Maps, including how to access the platform, select the correct image type, and add captions and descriptions.

Adding Images to Google Maps
Adding images to Google Maps is a great way to enhance your business’s online presence and provide users with a more immersive experience. In this section, we’ll explain how to add images to Google Maps, including how to access the platform, select the correct image type, and add captions and descriptions.
To add images to Google Maps, you’ll need to access the Google Maps platform. You can do this by signing in to your Google account and navigating to the Google Maps dashboard. From there, click on the “Add a photo” button to begin the upload process.
When adding images to Google Maps, you’ll need to select the correct image type. Google Maps allows you to upload different types of images, including interior photos, exterior photos, and street view photos. Make sure to select the correct image type to ensure that your image is displayed correctly.
In addition to selecting the correct image type, you’ll also need to add captions and descriptions to your images. Captions should be descriptive and accurate, and should not contain spam or misleading content. Descriptions should provide additional context for the image, and should not exceed 1000 characters.
When adding images to Google Maps, you can also use the platform’s built-in features to enhance your images. For example, you can use the “Street View” feature to add 360-degree photos of your business’s interior or exterior. You can also use the “Photos” feature to add additional images of your business.
By adding images to Google Maps, you can improve your business’s online visibility and provide users with a more immersive experience. In the next section, we’ll explain how to use Google Photos to share images, including how to upload images, create albums, and share links with others.
Using Google Photos to Share Images
Google Photos is a powerful platform that allows you to store, share, and manage your images. In this section, we’ll explain how to use Google Photos to share images, including how to upload images, create albums, and share links with others.
To get started with Google Photos, you’ll need to access the platform. You can do this by signing in to your Google account and navigating to the Google Photos dashboard. From there, you can upload images from your computer or mobile device.
Once you’ve uploaded your images, you can create albums to organize and share them with others. To create an album, simply click on the “Create album” button and select the images you want to include. You can also add captions and descriptions to your albums to provide additional context.
Sharing images with Google Photos is easy. You can share links to your albums or individual images with others via email or social media. You can also use the “Share” button to share your images with others who have a Google account.
Google Photos also offers a range of features that make it easy to manage and share your images. For example, you can use the “Auto-backup” feature to automatically backup your images from your mobile device. You can also use the “Search” feature to quickly find specific images in your collection.
By using Google Photos to share images, you can easily share your photos with others and keep them organized and backed up. In the next section, we’ll provide solutions to common issues that may arise when uploading images to Google, including image format errors, size limits, and upload failures.
Troubleshooting Common Image Upload Issues
When uploading images to Google, you may encounter some common issues that can prevent your images from being displayed correctly. In this section, we’ll provide solutions to common image upload issues, including image format errors, size limits, and upload failures.
One of the most common image upload issues is image format errors. Google supports a variety of image formats, including JPEG, PNG, and GIF. However, if you’re using an unsupported format, you may encounter errors when uploading your images. To resolve this issue, try converting your image to a supported format using an image editing software.
Another common issue is size limits. Google has size limits for images, and if your image exceeds these limits, you may encounter errors when uploading. To resolve this issue, try resizing your image to a smaller size using an image editing software.
Upload failures are also common when uploading images to Google. This can be caused by a variety of factors, including internet connectivity issues, server errors, and image corruption. To resolve this issue, try uploading your image again, and make sure that your internet connection is stable and your image is not corrupted.
In addition to these common issues, you may also encounter other errors when uploading images to Google. To resolve these issues, try checking Google’s image upload guidelines for troubleshooting tips. You can also try contacting Google’s support team for assistance.
By troubleshooting common image upload issues, you can ensure that your images are displayed correctly on Google. In the next section, we’ll offer tips on how to optimize images for Google, including how to use descriptive file names, alt tags, and captions to improve image visibility and search engine rankings.

Best Practices for Image Optimization
Optimizing your images for Google is crucial to improve their visibility and search engine rankings. In this section, we’ll offer tips on how to optimize images for Google, including how to use descriptive file names, alt tags, and captions to improve image visibility and search engine rankings.
Using descriptive file names is essential to optimize your images for Google. When naming your files, use descriptive keywords that accurately describe the content of the image. This will help Google understand the context of the image and improve its visibility in search results.
Alt tags are another important aspect of image optimization. Alt tags provide a text description of the image, which helps Google understand the content of the image. When writing alt tags, use descriptive keywords that accurately describe the content of the image, and keep them concise and to the point.
Captions are also important for image optimization. Captions provide additional context for the image, and help Google understand the relevance of the image to the surrounding content. When writing captions, use descriptive keywords that accurately describe the content of the image, and keep them concise and to the point.
In addition to using descriptive file names, alt tags, and captions, there are several other best practices for image optimization. These include using high-quality images, compressing images to reduce file size, and using responsive design to ensure that images display correctly on different devices.
By following these best practices for image optimization, you can improve the visibility and search engine rankings of your images on Google. This will help you to increase your online presence, drive more traffic to your website, and improve your overall online marketing strategy.