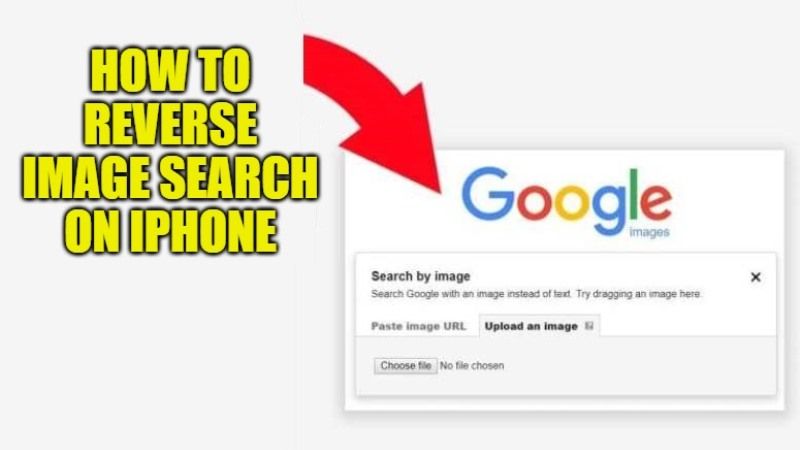
What is Reverse Image Search and Why Do You Need It?
Reverse image search is a powerful tool that allows users to search for images based on a reference image, rather than a text-based query. This technology has numerous benefits, particularly for iPhone users who want to identify the source of an image, find similar images, or even detect fake or manipulated images. By using reverse image search, users can uncover a wealth of information about an image, including its origin, usage, and related content.
In today’s digital age, images are a ubiquitous part of our online experience. With the rise of social media, image sharing, and online publishing, it’s easy to get lost in a sea of visual content. Reverse image search helps users navigate this landscape by providing a way to search for images that is more intuitive and effective than traditional text-based search methods.
For iPhone users, reverse image search can be a game-changer. Whether you’re a researcher, a student, or simply a curious individual, this technology can help you uncover new information, verify the authenticity of images, and even track down the source of a particular image. By using reverse image search, you can take your online research to the next level and gain a deeper understanding of the visual content that surrounds us.
So, how can you use reverse image search on your iPhone? The good news is that there are several methods available, including using Google Lens, third-party apps, and even Safari. In this article, we’ll explore the different ways to perform a reverse image search on your iPhone, as well as provide tips and tricks for getting the most out of this powerful technology.
By mastering reverse image search on your iPhone, you’ll be able to unlock a world of new possibilities and take your online research to new heights. Whether you’re a seasoned researcher or just starting out, this technology is sure to become an indispensable tool in your online toolkit.
How to Use Google Lens for Reverse Image Search on iPhone
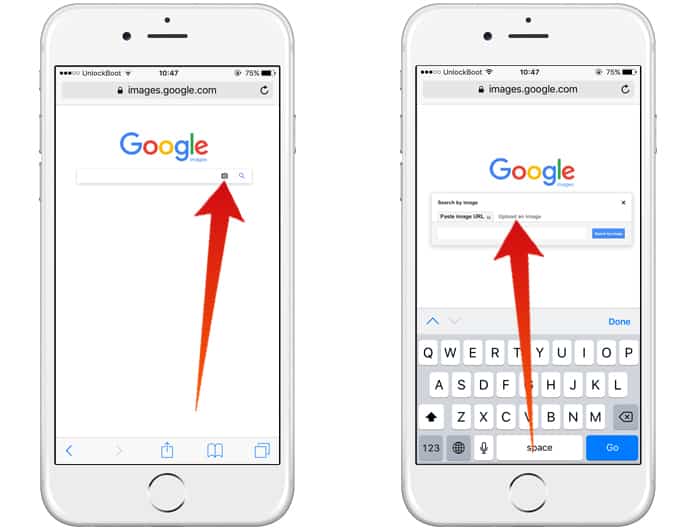
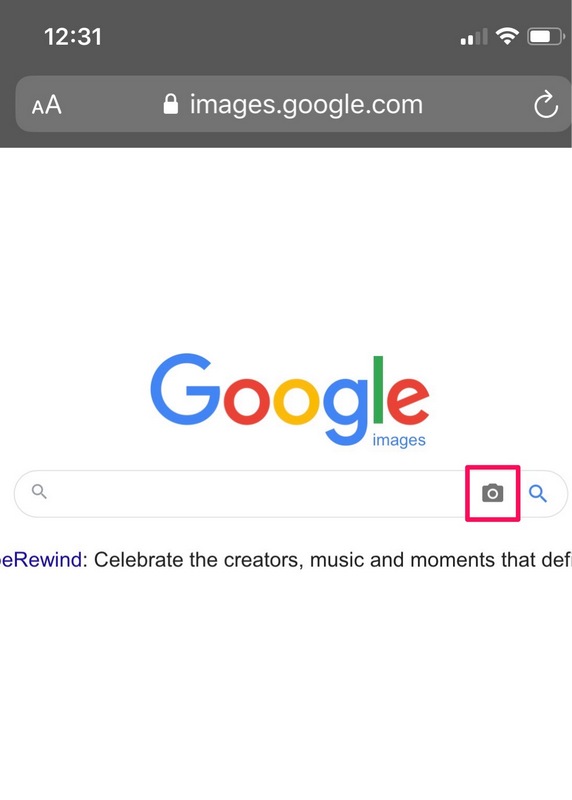
Google Lens is a powerful feature within the Google app that allows users to perform reverse image searches on their iPhone. To access Google Lens, open the Google app and tap the camera icon in the search bar. This will open the Google Lens interface, where you can upload or take a photo to search for similar images.
To use Google Lens for reverse image search, follow these steps:
1. Open the Google app on your iPhone and tap the camera icon in the search bar.
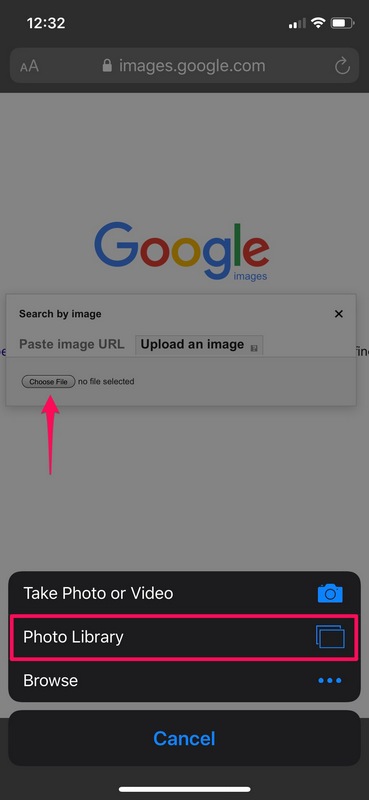
2. Take a photo of the image you want to search for, or upload an existing image from your camera roll.
3. Google Lens will analyze the image and provide search results, including similar images, related content, and even shopping results.
4. Tap on a search result to view more information, including the source of the image, related articles, and even videos.
Google Lens is a powerful tool for reverse image search on iPhone, and it’s free to use. By following these simple steps, you can unlock the power of Google Lens and take your online research to the next level.
In addition to Google Lens, there are other methods for performing reverse image searches on iPhone, including using third-party apps and Safari. However, Google Lens is one of the most effective and user-friendly options available, and it’s a great place to start for anyone looking to master reverse image search on their iPhone.
Alternative Methods for Reverse Image Search on iPhone
While Google Lens is a powerful tool for reverse image search on iPhone, there are other alternative methods available. One popular option is TinEye, a third-party app that allows users to search for images based on a reference image. TinEye is available for free on the App Store and offers a range of features, including the ability to search for similar images, identify the source of an image, and even detect fake or manipulated images.
Another alternative method for reverse image search on iPhone is Reversee, a third-party app that uses artificial intelligence to search for similar images. Reversee is available for free on the App Store and offers a range of features, including the ability to search for similar images, identify the source of an image, and even detect fake or manipulated images.
Both TinEye and Reversee offer a range of features and benefits, including the ability to search for similar images, identify the source of an image, and even detect fake or manipulated images. However, it’s worth noting that these apps may not be as effective as Google Lens, which has access to a vast database of images and uses advanced algorithms to search for similar images.
In addition to TinEye and Reversee, there are other alternative methods available for reverse image search on iPhone, including using Safari to perform a reverse image search. This method involves long-pressing on an image, selecting “Search Google for This Image,” and getting search results. While this method is not as effective as using Google Lens or a third-party app, it can still be a useful tool for identifying the source of an image or finding similar images.
Ultimately, the best method for reverse image search on iPhone will depend on your specific needs and preferences. Whether you use Google Lens, a third-party app, or Safari, the key is to find a method that works for you and provides the results you need.
Using Safari to Perform a Reverse Image Search on iPhone
Safari is a popular web browser on iPhone, and it also offers a built-in feature for reverse image search. To use Safari for reverse image search, follow these steps:
1. Open Safari on your iPhone and navigate to the webpage that contains the image you want to search for.
2. Long-press on the image until a menu appears.
3. Select “Search Google for This Image” from the menu.
4. Safari will open a new tab with the search results, including similar images, related content, and even shopping results.
Using Safari for reverse image search is a convenient option, especially if you’re already browsing the web on your iPhone. However, it’s worth noting that the results may not be as comprehensive as those obtained using Google Lens or a third-party app.
One of the benefits of using Safari for reverse image search is that it’s a built-in feature, so you don’t need to download any additional apps or software. Additionally, Safari’s reverse image search feature is easy to use and requires minimal setup.
However, there are some limitations to using Safari for reverse image search. For example, the feature may not work for all images, and the search results may not be as accurate as those obtained using other methods.
Overall, using Safari for reverse image search is a convenient and easy-to-use option, but it may not be the most effective method for obtaining comprehensive search results.
Tips and Tricks for Effective Reverse Image Search on iPhone
To get the most out of reverse image search on your iPhone, here are some tips and tricks to keep in mind:
1. Use specific keywords: When searching for an image, try using specific keywords related to the image, such as the name of the person, place, or object in the image. This can help narrow down the search results and improve the accuracy of the search.
2. Filter search results: Many reverse image search tools, including Google Lens, allow you to filter search results by factors such as image size, color, and type. This can help you quickly find the most relevant results.
3. Use the “Similar images” feature: Many reverse image search tools, including Google Lens, offer a “Similar images” feature that allows you to search for images that are similar to the one you’re searching for. This can be a great way to find more images of the same person, place, or object.
4. Experiment with different search methods: Don’t be afraid to try different search methods, such as using a different search engine or trying a different search query. This can help you find the most accurate and relevant results.
5. Use reverse image search in combination with other search tools: Reverse image search can be a powerful tool when used in combination with other search tools, such as text-based search engines or social media search tools. This can help you find more comprehensive and accurate results.
By following these tips and tricks, you can get the most out of reverse image search on your iPhone and improve your online research skills.
Common Issues and Troubleshooting for Reverse Image Search on iPhone
While reverse image search on iPhone can be a powerful tool, there are some common issues that may arise. Here are some troubleshooting steps to help resolve these issues:
Poor Image Quality:
If the image quality is poor, it may be difficult for the reverse image search algorithm to accurately identify the image. To resolve this issue, try uploading a higher-quality version of the image or taking a new photo with better lighting and focus.
Incorrect Search Results:
If the search results are incorrect, it may be due to a number of factors, including poor image quality or incorrect metadata. To resolve this issue, try re-uploading the image or checking the metadata to ensure it is accurate.
App Crashes:
If the app crashes while performing a reverse image search, it may be due to a software issue or a problem with the device’s hardware. To resolve this issue, try restarting the app or restarting the device.
Other Issues:
If you encounter any other issues while using reverse image search on iPhone, try checking the app’s settings or contacting the app’s support team for assistance.
By following these troubleshooting steps, you should be able to resolve any common issues that may arise while using reverse image search on iPhone.
Privacy and Security Considerations for Reverse Image Search on iPhone
When using reverse image search on iPhone, it’s essential to consider the privacy and security implications of this technology. Here are some key considerations:
Data Collection:
Reverse image search apps and services may collect data about your search queries, including the images you upload or search for. This data may be used to improve the app’s performance or to provide targeted advertising.
Image Storage:
Some reverse image search apps may store the images you upload or search for on their servers. This raises concerns about data security and the potential for unauthorized access to your images.
Potential Risks:
Reverse image search can also raise concerns about potential risks, such as the spread of misinformation or the use of manipulated images. It’s essential to be aware of these risks and to use reverse image search responsibly.
Protecting Your Personal Data:
To protect your personal data when using reverse image search on iPhone, follow these best practices:
1. Read the app’s terms of service and privacy policy before using it.
2. Be cautious when uploading or searching for sensitive images.
3. Use a reputable and trustworthy reverse image search app or service.
4. Regularly review and delete your search history and uploaded images.
By being aware of the privacy and security considerations of reverse image search on iPhone, you can use this technology responsibly and protect your personal data.
Conclusion: Mastering Reverse Image Search on Your iPhone
In conclusion, reverse image search is a powerful tool that can be used on iPhone to identify the source of an image, find similar images, and even detect fake or manipulated images. By using Google Lens, alternative methods, and Safari, iPhone users can unlock the full potential of reverse image search.
Throughout this article, we have discussed the benefits and best practices for using reverse image search on iPhone. We have also addressed common issues and provided troubleshooting steps to resolve them. Additionally, we have discussed the privacy and security implications of using reverse image search on iPhone and offered advice on how to protect personal data and maintain online security.
By mastering reverse image search on iPhone, users can become more proficient in their online research and stay ahead of the curve in the digital age. Whether you’re a student, researcher, or simply a curious individual, reverse image search is a valuable tool that can help you achieve your goals.
So, what are you waiting for? Start exploring the different methods and tools available for reverse image search on iPhone and become a master of this powerful technology.

