What Makes an Image High-Resolution?
Image resolution is a critical factor in determining the overall quality of a photo. It refers to the number of pixels that make up an image, with higher resolutions indicating a greater number of pixels. A high-resolution image is typically characterized by its crisp and clear appearance, with well-defined lines, vibrant colors, and detailed textures. But what exactly sets high-resolution images apart from their lower-resolution counterparts?
One key difference is the level of detail that high-resolution images can capture. With more pixels to work with, high-resolution images can reproduce subtle nuances in color and texture that might be lost in lower-resolution images. This is particularly important for applications where image quality is paramount, such as in professional photography, graphic design, and digital art.
Another important consideration is the intended use of the image. For example, an image that will be viewed on a small screen, such as a smartphone, may not require the same level of resolution as an image that will be printed in large format. However, if you’re looking to create high-quality prints or display your images on a large screen, a high-resolution image is essential.
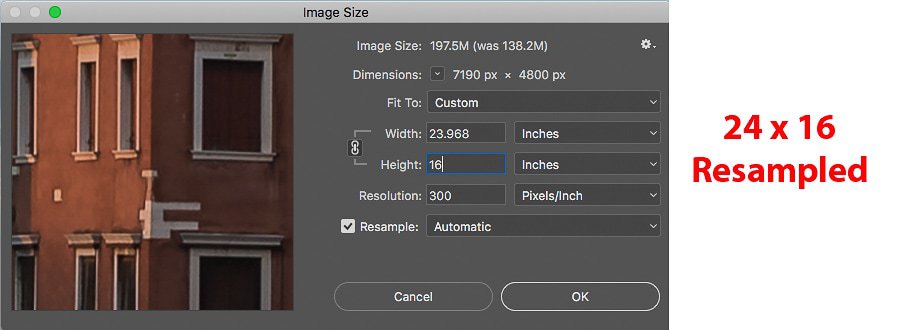
So, how can you tell if a photo is high resolution? One way to check is to look at the image’s file size. Generally speaking, higher-resolution images have larger file sizes. However, this is not always a reliable indicator, as image compression and other factors can affect file size. A more accurate way to determine an image’s resolution is to check its pixel dimensions, which can usually be found in the image’s metadata or by using image editing software.
Understanding image resolution is crucial for anyone working with digital images. By knowing how to identify high-resolution images, you can ensure that your photos and graphics are of the highest quality, whether you’re a professional photographer, graphic designer, or simply an enthusiast looking to improve your skills. In the next section, we’ll explore some visual cues that can help you spot high-resolution images.
Visual Cues: How to Spot a High-Resolution Image
High-resolution images have distinct visual characteristics that set them apart from lower-resolution images. One of the most noticeable differences is the crispness of the lines and edges. High-resolution images tend to have sharp, well-defined lines, while lower-resolution images may appear blurry or pixelated.
Another visual cue is the vibrancy of the colors. High-resolution images often display a wider range of colors and more subtle nuances in tone and texture. This is particularly noticeable in images with complex patterns or textures, such as landscapes or still-life compositions.
Detailed textures are also a hallmark of high-resolution images. Whether it’s the intricate patterns on a leaf or the subtle weave of a fabric, high-resolution images can capture the smallest details with remarkable clarity.
When examining an image, look for these visual cues to determine if it’s high-resolution. Check the edges and lines for crispness, and examine the colors for vibrancy and nuance. Also, take a closer look at the textures and patterns to see if they’re detailed and well-defined.
For example, consider a landscape photograph of a mountain range. A high-resolution image would capture the intricate details of the rocks, trees, and snow, while a lower-resolution image might appear blurry or pixelated. Similarly, a high-resolution image of a still-life composition would display the subtle textures and patterns of the objects, while a lower-resolution image might appear flat and two-dimensional.
By paying attention to these visual cues, you can develop your skills in identifying high-resolution images and improve your overall understanding of image quality.
Checking the File Size: A Clue to Image Quality
When trying to determine if a photo is high resolution, one common method is to check the file size. Generally speaking, higher-resolution images tend to have larger file sizes. This is because high-resolution images contain more pixels, which require more data to store.
For example, a high-resolution image of 3000 x 2000 pixels might have a file size of 5-10 megabytes (MB), while a lower-resolution image of 1000 x 667 pixels might have a file size of 1-2 MB. However, it’s essential to note that file size is not always a reliable indicator of image quality.
There are several exceptions and limitations to consider. For instance, image compression can significantly reduce the file size of an image without affecting its resolution. Additionally, some image formats, such as JPEG, are designed to compress images, which can result in smaller file sizes without sacrificing quality.
Another factor to consider is the image’s bit depth. Images with a higher bit depth, such as 16-bit or 32-bit, tend to have larger file sizes than those with a lower bit depth, such as 8-bit. However, bit depth is not directly related to resolution, so it’s essential to consider other factors when evaluating image quality.
While checking the file size can provide some clues about image quality, it’s crucial to consider other factors, such as the image’s dimensions, pixel density, and compression level. By taking a more comprehensive approach, you can gain a better understanding of an image’s resolution and overall quality.
In the next section, we’ll explore the role of megapixels in camera resolution and how it affects image quality.
The Role of Megapixels: Understanding Camera Resolution
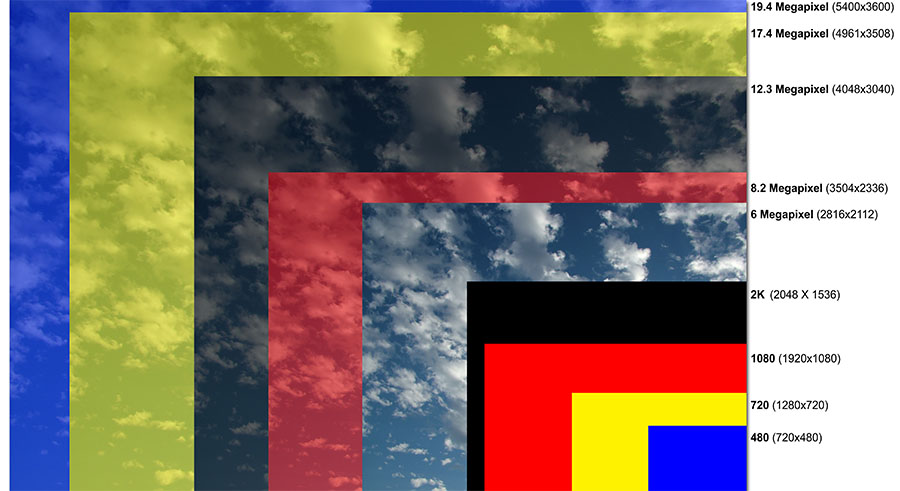
Megapixels are a common measure of a camera’s resolution, but what exactly do they mean? In simple terms, a megapixel is equal to one million pixels. The more megapixels a camera has, the higher its resolution and the more detailed the images it can capture.
However, it’s essential to note that more megapixels don’t always mean a higher quality image. Other factors, such as the camera’s sensor size, lens quality, and image processing algorithms, also play a significant role in determining image quality.
For example, a camera with 12 megapixels may produce higher-quality images than a camera with 16 megapixels if the 12-megapixel camera has a larger sensor and better lens. Additionally, some cameras may use interpolation to increase the megapixel count, which can actually decrease image quality.
So, when does the number of megapixels matter? In general, more megapixels are beneficial when:
- Cropping or enlarging images: More megapixels provide more flexibility when cropping or enlarging images without sacrificing quality.
- Printing large images: Higher megapixel counts are necessary for printing large images without visible pixelation.
- Professional photography: High-end cameras with high megapixel counts are often used in professional photography to capture detailed, high-quality images.
On the other hand, the number of megapixels may not be as crucial for:
- Web use: Images displayed on the web are typically compressed and resized, making high megapixel counts less necessary.
- Smartphone cameras: While more megapixels can be beneficial, other factors like sensor size and lens quality are more important for smartphone cameras.
By understanding the role of megapixels in camera resolution, you can make informed decisions when choosing a camera or evaluating image quality.
Inspecting the Image: A Closer Look at Pixels and Artifacts
To determine if a photo is high resolution, it’s essential to inspect the image more closely. One way to do this is to zoom in on the image using image editing software. This will allow you to examine the pixels and look for any signs of artifacts or quality issues. When zoomed in, a high-resolution image will typically display crisp, clear pixels with no visible artifacts or blurriness.
Pixelation is a common issue with low-resolution images. When an image is pixelated, it appears blocky or fuzzy, with visible pixels that can be distracting. To check for pixelation, zoom in on the image and look for any areas where the pixels appear to be blocky or fuzzy. If the pixels are crisp and clear, it’s likely that the image is high resolution.
Artifacts are another issue that can affect image quality. Artifacts can appear as strange lines, shapes, or patterns that are not part of the original image. These can be caused by a variety of factors, including image compression or editing errors. To check for artifacts, zoom in on the image and look for any unusual patterns or shapes. If the image appears to be free of artifacts, it’s likely that it is high resolution.
When inspecting an image, it’s also important to look for any signs of over-sharpening or over-compression. Over-sharpening can cause an image to appear unnatural or overly processed, while over-compression can cause the image to appear blocky or fuzzy. To check for these issues, look for any areas where the image appears to be overly processed or unnatural.
By inspecting an image more closely, you can get a better sense of its resolution and overall quality. This can be especially useful when working with images that will be used for professional or commercial purposes, where high image quality is essential. By taking the time to inspect an image and look for any signs of quality issues, you can ensure that your images are of the highest quality and will look great in any context.
Learning how to tell if a photo is high resolution takes practice, but by following these tips and inspecting images more closely, you can develop your skills and become more confident in your ability to identify high-quality images. Whether you’re a professional photographer or just starting out, being able to identify high-resolution images is an essential skill that can help you take your photography to the next level.
Comparing Images: A Side-by-Side Test
One of the most effective ways to determine if a photo is high resolution is to compare it to another image of the same scene or subject. By placing the two images side-by-side, you can easily see the differences in quality and resolution. This method is especially useful when trying to decide which image to use for a particular project or application.
To perform a side-by-side test, start by selecting two images that are similar in content and composition. Open both images in an image editing software, such as Adobe Photoshop or Lightroom, and adjust the zoom level so that both images are displayed at the same size. This will allow you to compare the images more easily.
Next, look for differences in the level of detail and clarity between the two images. A high-resolution image will typically display more detailed textures, sharper lines, and more vibrant colors. Look for areas of the image where the details are most pronounced, such as in the shadows or highlights.
Another way to compare the images is to look for differences in the noise level. Noise refers to the random pixels that can appear in an image, especially in low-light conditions. A high-resolution image will typically have less noise and appear smoother and more natural.
By comparing the two images side-by-side, you can get a better sense of which image is of higher resolution. This method can be especially useful when working with images that will be used for commercial or professional purposes, where high image quality is essential.
When comparing images, it’s also important to consider the intended use of the image. For example, if the image will be used for web purposes, a lower resolution image may be sufficient. However, if the image will be used for print purposes, a higher resolution image will be necessary.
Learning how to tell if a photo is high resolution takes practice, but by using the side-by-side test, you can develop your skills and become more confident in your ability to identify high-quality images. By taking the time to compare images and look for differences in quality and resolution, you can ensure that your images are of the highest quality and will look great in any context.
Image Compression: The Impact on Resolution
Image compression is a common technique used to reduce the file size of an image, making it easier to store and transmit. However, compression can also affect the resolution of an image, making it more difficult to determine if a photo is high resolution. Understanding the impact of compression on resolution is essential for identifying high-quality images.
There are two main types of image compression: lossy and lossless. Lossy compression reduces the file size of an image by discarding some of the data, which can result in a loss of detail and resolution. Lossless compression, on the other hand, reduces the file size without discarding any data, preserving the original resolution and quality of the image.
Lossy compression is commonly used in formats such as JPEG, which is widely used for web and digital images. While lossy compression can significantly reduce the file size of an image, it can also result in a loss of detail and resolution. This can make it more difficult to determine if a photo is high resolution, as the compression can mask some of the image’s original quality.
Lossless compression, on the other hand, is commonly used in formats such as PNG and TIFF. These formats preserve the original resolution and quality of the image, making it easier to determine if a photo is high resolution.
To identify compressed images, look for signs of lossy compression, such as blocky or pixelated areas, or a general softening of the image. You can also check the file format and size to determine if the image has been compressed. If the image is in a lossy format such as JPEG, it may have been compressed, which can affect its resolution.
When working with compressed images, it’s essential to consider the intended use of the image. If the image will be used for web purposes, a compressed image may be sufficient. However, if the image will be used for print purposes, a high-resolution, uncompressed image is necessary.
Understanding the impact of compression on resolution is crucial for identifying high-quality images. By recognizing the signs of compression and considering the intended use of the image, you can make informed decisions about the quality of an image and determine if it is high resolution.
Conclusion: Mastering the Art of Identifying High-Resolution Images
Identifying high-resolution images requires a combination of technical knowledge and visual inspection. By understanding the concept of image resolution, visual cues, file size, megapixels, and compression, you can develop the skills to confidently identify high-quality images.
Remember, high-resolution images are not just about the number of megapixels, but also about the overall quality of the image. By inspecting the image for signs of high resolution, such as crisp lines, vibrant colors, and detailed textures, you can determine if a photo is of high quality.
Additionally, comparing images side-by-side and checking for compression can also help you identify high-resolution images. By mastering these techniques, you can develop your eye for image quality and make informed decisions about the images you use.
Whether you’re a professional photographer, graphic designer, or simply a photography enthusiast, being able to identify high-resolution images is an essential skill. By following the tips and techniques outlined in this article, you can improve your skills and develop a keen eye for image quality.
So, how to tell if a photo is high resolution? By combining technical knowledge with visual inspection, you can confidently identify high-quality images. Remember to inspect the image for signs of high resolution, check the file size and megapixels, and consider the impact of compression. With practice and patience, you can master the art of identifying high-resolution images and take your photography skills to the next level.
By developing your skills in identifying high-resolution images, you can ensure that your images are of the highest quality and will look great in any context. Whether you’re printing, sharing online, or using images for commercial purposes, high-resolution images are essential for making a great impression.


