Understanding Image Resolution: What You Need to Know
Image resolution is a critical aspect of photography that significantly impacts the quality of photos taken with an iPhone. In essence, image resolution refers to the number of pixels that make up an image, with higher resolutions indicating a greater number of pixels and, consequently, a more detailed and crisp image. When it comes to mobile photography, understanding image resolution is vital for capturing and sharing high-quality photos. Knowing how to tell photo resolution on iPhone can help users optimize their camera settings and editing techniques to achieve the best possible results.
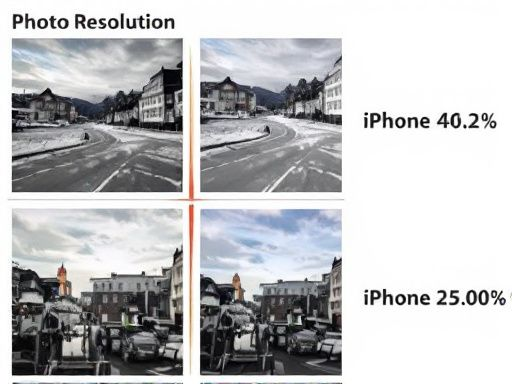
The difference between high and low resolution is stark, with high-resolution images boasting a higher pixel density and a more refined appearance. This distinction is particularly important when sharing and printing photos, as low-resolution images can appear pixelated and blurry when enlarged or printed. In contrast, high-resolution images retain their clarity and definition, making them ideal for sharing on social media, printing, or displaying on large screens.
Image resolution is typically measured in pixels per inch (PPI) or dots per inch (DPI), with higher values indicating a higher resolution. For instance, an image with a resolution of 300 DPI is considered high-resolution and suitable for printing, while an image with a resolution of 72 DPI is considered low-resolution and better suited for web use. Understanding these metrics is essential for photographers who want to optimize their images for specific applications.
When it comes to iPhone photography, the device’s camera hardware and software play a significant role in determining image resolution. The latest iPhone models, such as the iPhone 14 Pro and iPhone 13 Pro, feature advanced camera systems with high-resolution sensors and sophisticated image processing algorithms. These advancements enable users to capture high-quality photos with excellent resolution and detail. However, even with these advanced cameras, knowing how to tell photo resolution on iPhone is crucial for achieving the best possible results.
How to Check Photo Resolution on Your iPhone
To determine the resolution of a photo on an iPhone, users can access the photo’s metadata or utilize third-party apps. The following steps outline how to tell photo resolution on iPhone using the native Photos app and other tools.
Step 1: Open the Photos app and select the desired photo. Tap the “Share” icon, represented by a box with an arrow coming out of it, and then tap “Save to Files.” This will save the photo to the Files app, allowing access to its metadata.
Step 2: Open the Files app and locate the saved photo. Tap the “Info” icon, represented by a circle with an “i” inside, to view the photo’s metadata. The metadata will display the photo’s resolution, file size, and other details.
Alternatively, users can employ third-party apps, such as Photo Investigator or Exif Viewer, to check photo resolution on an iPhone. These apps provide detailed information about the photo, including its resolution, camera settings, and location data.
To use a third-party app, simply download and install it from the App Store, then follow the in-app instructions to access the photo’s metadata. This method offers a more comprehensive view of the photo’s details, making it easier to determine its resolution.
When checking photo resolution, it is essential to understand the different resolution options available on an iPhone. The iPhone camera can capture photos in various resolutions, including 4032 x 3024 pixels, 3024 x 4032 pixels, and 1200 x 1600 pixels. The resolution will depend on the iPhone model, camera settings, and other factors.
By following these steps, users can easily determine the resolution of a photo on their iPhone, allowing them to optimize their camera settings and editing techniques for better image quality. Understanding how to tell photo resolution on iPhone is crucial for mobile photographers who want to produce high-quality images.
Using the Photos App to View Image Details
The native Photos app on an iPhone provides a convenient way to view image details, including the resolution, file size, and camera settings used to capture the photo. To access this information, open the Photos app and select the desired photo. Tap the “Share” icon, represented by a box with an arrow coming out of it, and then tap “Save to Files.” This will save the photo to the Files app, where the image details can be viewed. Alternatively, swipe up on the photo to reveal the image details, including the resolution, file size, and camera settings. Understanding how to tell photo resolution on iPhone using the Photos app is essential for photographers who want to optimize their camera settings for better image quality.
Third-Party Apps for Checking Photo Resolution
Several third-party apps are available that can help users determine the resolution of their photos on an iPhone. These apps offer more detailed information about the image, including EXIF data, which can be useful for photographers who want to optimize their camera settings for better image quality. Some popular options include Photo Investigator, Exif Viewer, and Photo Details. These apps can be downloaded from the App Store and offer a range of features, such as the ability to view image metadata, check photo resolution, and even edit photos directly within the app.
One of the key benefits of using third-party apps to check photo resolution on an iPhone is that they often provide more detailed information than the native Photos app. For example, Photo Investigator offers a range of features, including the ability to view EXIF data, check photo resolution, and even detect if an image has been edited or manipulated. This can be particularly useful for photographers who want to ensure that their images are of the highest quality and have not been tampered with.
Another benefit of using third-party apps is that they can provide users with more control over their photos. For example, Exif Viewer allows users to edit the metadata associated with their photos, which can be useful for adding captions or keywords to images. Additionally, some apps offer features such as image compression and resizing, which can be useful for optimizing photos for sharing or printing.
When choosing a third-party app to check photo resolution on an iPhone, it’s essential to consider the features and benefits that are most important to you. Some apps may offer more advanced features, such as image editing or metadata editing, while others may provide a more straightforward and easy-to-use interface. By considering your needs and preferences, you can choose an app that meets your requirements and helps you to get the most out of your iPhone’s camera.
Overall, third-party apps can be a valuable tool for anyone looking to determine the resolution of their photos on an iPhone. By providing more detailed information about the image and offering advanced features such as image editing and metadata editing, these apps can help users to optimize their camera settings and take better photos. Whether you’re a professional photographer or just starting out, using a third-party app to check photo resolution can be an effective way to improve your mobile photography skills and take your photos to the next level.
Factors That Affect Photo Resolution on an iPhone
When it comes to capturing high-quality photos with an iPhone, understanding the factors that affect photo resolution is crucial. Several elements can impact the resolution of an image, including camera settings, lighting conditions, and image compression. To optimize camera settings for better image quality and learn how to tell photo resolution on iPhone, it is essential to consider these factors.
Camera settings play a significant role in determining photo resolution. The iPhone’s camera app offers various modes, such as Portrait, Landscape, and Night mode, each with its own set of settings that can affect image quality. For instance, using the HDR (High Dynamic Range) feature can improve the contrast and color accuracy of an image, resulting in a higher resolution. Additionally, adjusting the exposure compensation and using the flash can also impact the final image quality.
Lighting conditions are another critical factor that affects photo resolution. Adequate lighting is essential for capturing high-quality images, as it allows the camera to capture more detail and texture. Natural light is always the best option, but when shooting indoors, using artificial light sources can help improve the image quality. However, harsh or low light conditions can lead to noise, grain, or pixelation, ultimately reducing the photo resolution.
Image compression is another factor that can impact photo resolution. When an image is compressed, its file size is reduced, but this can also lead to a loss of detail and texture. The iPhone’s camera app compresses images by default, but users can adjust the compression settings or use third-party apps to minimize the impact on image quality.
To optimize camera settings for better image quality, users can follow a few simple tips. Firstly, use the HDR feature whenever possible, as it can significantly improve the contrast and color accuracy of an image. Secondly, adjust the exposure compensation to ensure that the image is not over or underexposed. Finally, use the flash judiciously, as it can add depth and texture to an image, but can also lead to harsh shadows and unflattering light.
By understanding the factors that affect photo resolution on an iPhone and adjusting camera settings accordingly, users can capture high-quality images that are perfect for sharing and printing. Whether it’s a stunning landscape or a precious family moment, learning how to tell photo resolution on iPhone can help users unlock the full potential of their device’s camera and take their mobile photography skills to the next level.
Comparing Photo Resolution on Different iPhone Models
When it comes to photo resolution, different iPhone models have varying capabilities. Understanding these differences can help users determine the best approach for capturing high-quality images. The latest iPhone models, such as the iPhone 14 Pro and iPhone 13 Pro, boast advanced camera hardware and software that significantly impact image quality. For instance, the iPhone 14 Pro features a 48-megapixel main camera, while the iPhone 13 Pro has a 12-megapixel main camera. These differences in camera resolution can affect the overall photo resolution and quality.
In addition to camera hardware, the software also plays a crucial role in determining photo resolution. The latest iPhone models come equipped with advanced image processing algorithms that help optimize image quality. These algorithms can affect the final photo resolution, especially when it comes to features like noise reduction and image compression. When considering how to tell photo resolution on iPhone, it’s essential to take into account the specific model and its capabilities.
A comparison of the camera capabilities of different iPhone models reveals significant differences in photo resolution. For example, the iPhone 12 has a 12-megapixel main camera, while the iPhone 11 has a 12-megapixel main camera with a slightly lower aperture. These differences can result in varying photo resolutions, especially in low-light conditions. Furthermore, the latest iPhone models have improved features like Night mode and Deep Fusion, which can significantly enhance image quality and resolution.
When choosing an iPhone model for photography, it’s essential to consider the camera capabilities and how they impact photo resolution. While older iPhone models can still capture high-quality images, the latest models offer significant improvements in camera hardware and software. By understanding the differences in photo resolution between various iPhone models, users can make informed decisions about which device to use for their photography needs and learn how to tell photo resolution on iPhone effectively.
Tips for Taking High-Resolution Photos with Your iPhone
To capture high-resolution photos with an iPhone, it is essential to understand the importance of camera settings, lighting conditions, and image editing techniques. When taking photos, using good lighting is crucial, as it significantly affects image quality. Natural light is always the best option, so taking photos near a window or outside during the golden hour can result in stunning high-resolution images. However, if shooting in low-light conditions is unavoidable, using the iPhone’s built-in flash or investing in a portable lighting kit can help improve image quality.
Adjusting camera settings is also vital for capturing high-resolution photos. The iPhone’s native Camera app offers various modes, including Portrait, Landscape, and Night mode, each designed to optimize image quality in different shooting conditions. Using the HDR feature can also enhance image quality by capturing a wider range of tonal values. Additionally, tapping on the sun/cloud icon to adjust exposure compensation can help balance the brightness and darkness in the image.
Another way to enhance photo resolution on an iPhone is by editing images using third-party apps. Apps like Adobe Lightroom and VSCO offer advanced editing tools, including noise reduction, sharpening, and exposure adjustments, which can significantly improve image quality. When editing photos, it is essential to avoid over-processing, as this can lead to a loss of detail and a decrease in image resolution.
Understanding how to tell photo resolution on iPhone is also crucial for mobile photographers. By checking the image details, photographers can determine the resolution of their photos and make adjustments accordingly. For instance, if a photo has a low resolution, editing it using third-party apps may not be enough to improve its quality. In such cases, re-taking the photo using optimized camera settings may be necessary.
Finally, experimenting with different camera settings and editing techniques is key to mastering high-resolution photography on an iPhone. By trying out various modes, features, and editing tools, photographers can develop their skills and capture stunning high-resolution images that rival those taken with professional cameras. With practice and patience, anyone can take their mobile photography skills to the next level and capture breathtaking high-resolution photos with their iPhone.
Conclusion: Mastering Photo Resolution on Your iPhone
Mastering photo resolution on an iPhone requires a combination of understanding the concept of image resolution, knowing how to check photo resolution, and optimizing camera settings for better image quality. By following the steps outlined in this guide, users can unlock their iPhone’s photo secrets and take high-resolution photos that are perfect for sharing and printing. When it comes to how to tell photo resolution on iPhone, it is essential to remember that image resolution plays a crucial role in determining the overall quality of a photo. By using the native Photos app or third-party apps to check photo resolution, users can ensure that their photos meet the required standards. Additionally, by adjusting camera settings, using good lighting, and editing photos using third-party apps, users can take their mobile photography skills to the next level. With practice and patience, anyone can master photo resolution on their iPhone and capture stunning images that are sure to impress.


